How to Upload the Megento Plugin Zil File
The default Magento 2 offers nifty functionality for any east-shop, but to provide truthful personalization for your business needs, yous must besides use third-party extensions. Past using such modules, you tin optimize your shop's speed, increase sales and revenue, retain customers, improve prophylactic and much, much more.
Modularity of Magento 2 is its core feature, which allows you to change the vital parts of your eCommerce store, which suggests that any Magento 2 shop possessor should learn how to install, update, activate and deactivate extensions in his or her due east-shop.
This commodity elaborates in detail where to get a Magento 2 module, how to install it, and how to manage it after installation.
-
Prerequisites
-
Where to get a Magento extension
-
How to install Magento extension
-
How to upgrade a Magento two extension
-
How to uninstall Magento two extension
-
Summary
Prerequisites
A best practice is to install and test an extension in a development environment before deploying it on the production store. Magento installations hosted on Commerce Cloud require an extension to exist installed in a Magento development environment before existence pushed to production. Delight note that this article doesn't include the specifics of the upgrade for Magento hosted on Commerce Cloud.
Check PHP version
Verify that the PHP version installed on your server meets the requirements, which are listed on Magento DevDocs Organisation requirements page.
In your Magento installation folder, execute the control php -five and make note of your PHP version.
If the PHP version is compatible with your Magento version, you can execute commands starting from bin/magento.
When the php -5 command shows an error or incompatible PHP version, then you lot need to explicitly call the PHP interpreter when running Magento commands. Without the explicit call, you may receive a PHP Parse fault: syntax error, unexpected ')' when executing command bin/magento.
To make an explicit interpreter telephone call, it is frequently sufficient to add phpX.X to before whatever command bin/magento. Replace phpX.X with the installed PHP version, for example, php 7.4.

Sometimes to make an explicit phone call, information technology is necessary to specify the full path to PHP installation binder.
Consult with your organization administrator to become details on the installation peculiarities on your server. If possible, ask the ambassador to configure the server and then that the interpreter phone call php was linked to the compatible PHP version.
In this commodity, the installed version of PHP is vii.iii, and so the commands are executed as php7.three bin/magento.
Magento backup
Before installing extensions and updates on the production shop, it is strongly recommended that y'all make a backup.
When trying to execute the built-in Magento backup command php7.3 bin/magento setup:backup --code --media –db, you will receive a fail message:
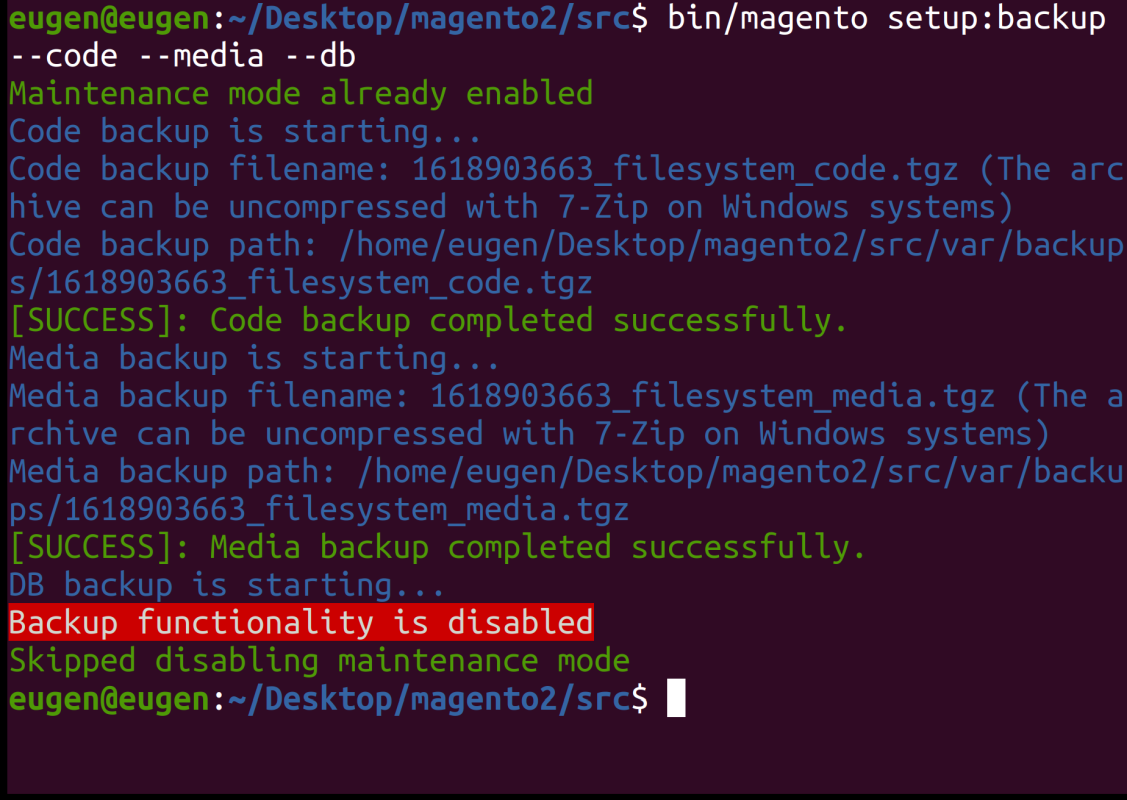
Magento depreciated built-in tools for making backups since version two.three.0, and advises merchants to investigate third-party fill-in tools.
Manual Magento backup
As a temporary solution you tin can make a manual Magento backup. Simply navigate to the Magento installation folder and copy its files and media to a backup disk.
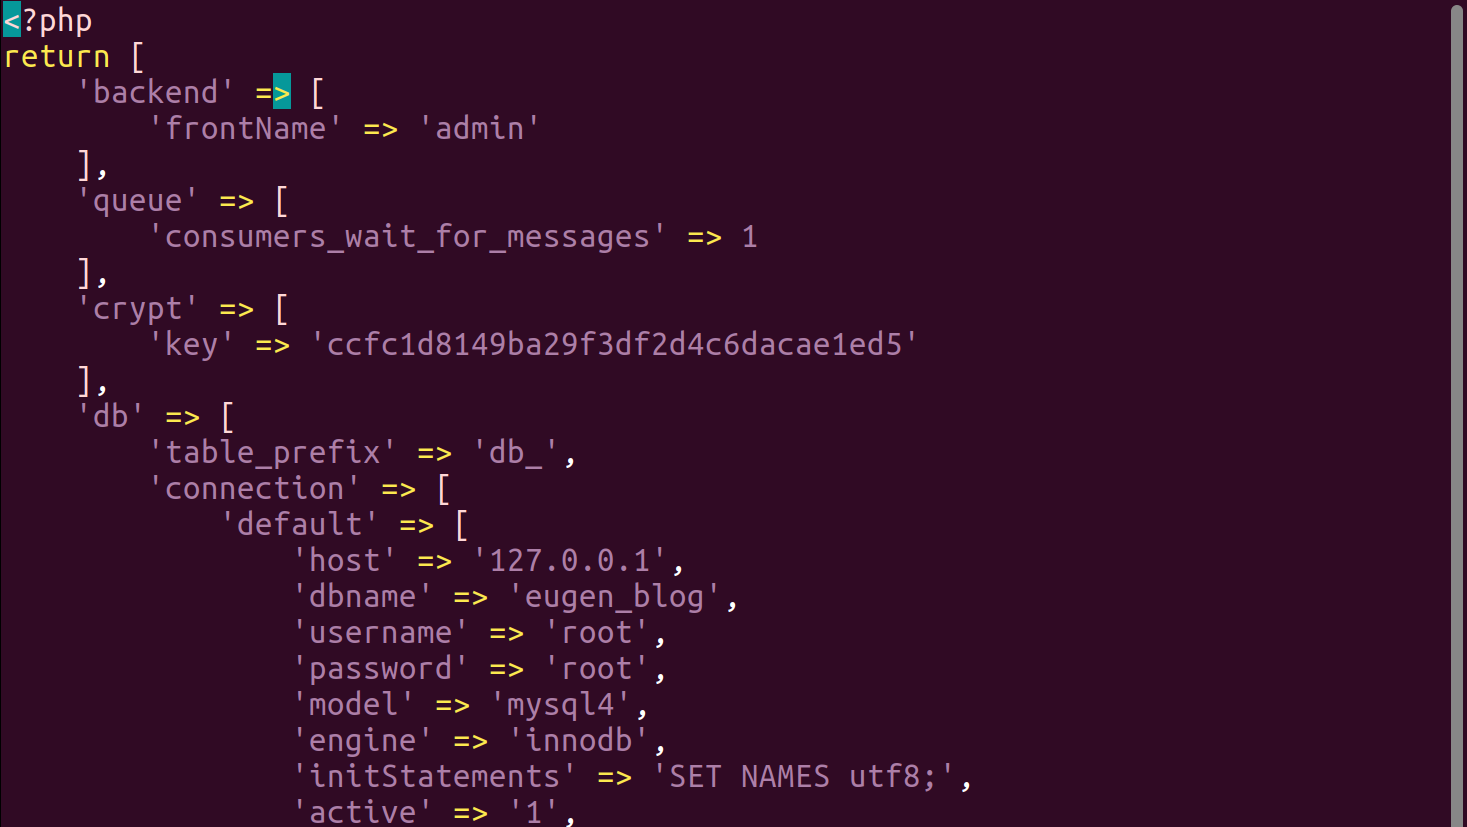
Using command line navigate to your Magento folder and execute control cat app/etc/env.php to access the file with database connection information. Take a note of parameters for host, dbname, username, password.
Brand a backup of your Magento store database using command line interface:
mysqldump -u root -p database_name > database_name.sql When connecting to the database on a remote server, use the command mysqldump --host=name -u root -p database_name > database_name.sql
For example, your database name is warmer 241, so the backup control will be mysqldump -u root -p warmer241 > warmer241.sql. The backup file warmer241.sql will exist located in electric current directory.
Copy the SQL file to the backup disk. Once yous take the database fill-in SQL file, y'all can restore the database with a command:
mysql -u root -p -D database_name < database_name.sql For the full mysqldump reference, refer to the manual of your relational database management system. For MariaDB management system, read the documentation on mysqldump.
Depending on the size of your store and data book, the backup and restoration processes may accept a some time.
Enable maintenance mode
During the upgrade your site stays accessible to customers. This can cause problems for users who endeavour to access the component which is being upgraded, so information technology is advised that you activate maintenance mode. Read the full information on maintenance fashion on Magento DevDocs.
The maintenance mode is helpful while yous are maintaining, upgrading, or reconfiguring your site.
Enable the Magento maintenance mode with the command:
php7.three bin/magento maintenance:enable To disable maintenance fashion, execute:
php7.iii bin/magento maintenance:disable 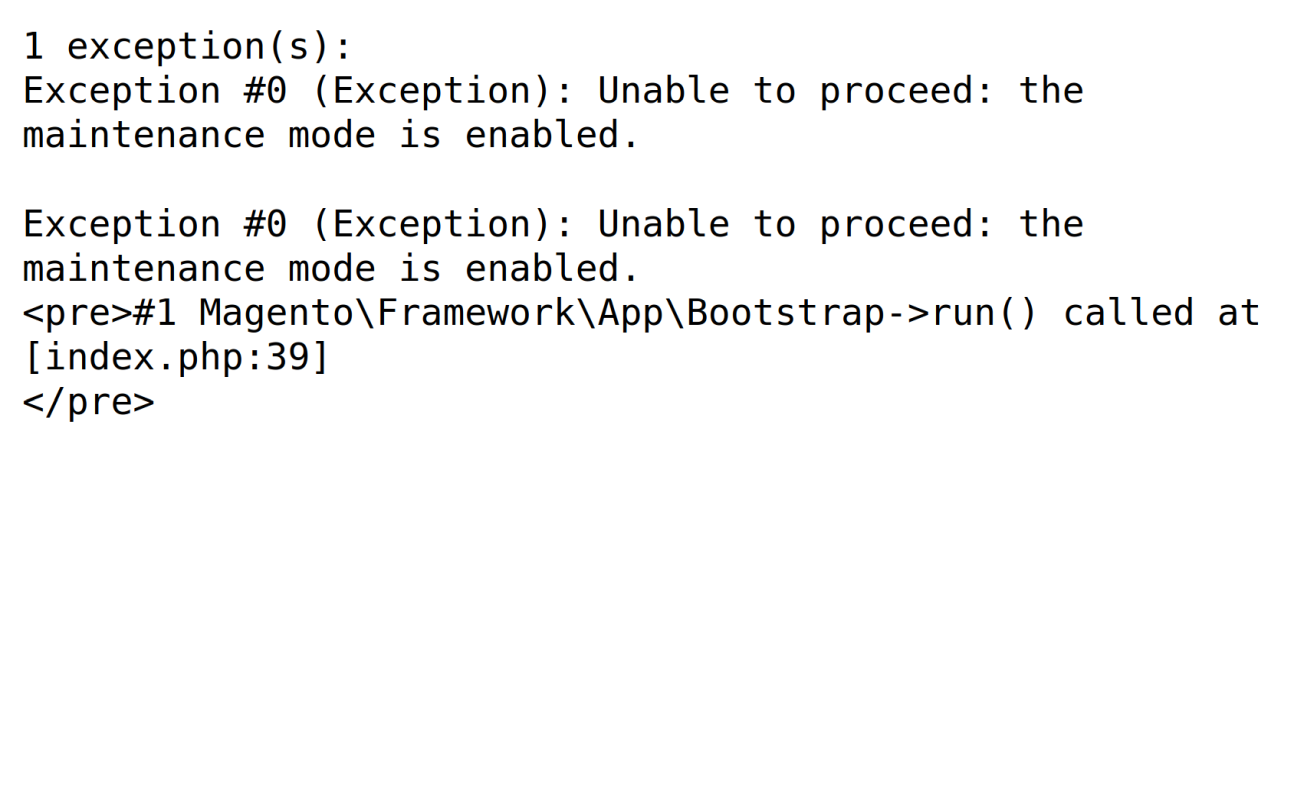
During the fourth dimension of maintenance, the Magento shop will display the maintenance folio to all visitors. To exist attainable for an ambassador, brand an exemption for the particular IP accost with the command:
php7.3 bin/magento maintenance:enable [--ip=<ip address> ... --ip=<ip address>] | [ip=none] The list of exempted IP-addresses will be saved for later use. To clear it, execute php7.3 bin/magento maintenance:enable --ip=none.
You can create a custom maintenance page that is more aesthetically pleasant than the default maintenance page. Refer to the Magento DevDocs.
Where to become a Magento extension
Magento supports extending its functionality with several types of third-political party components, and most mutual among them are three types of extensions:
-
Modules which extend Magento capabilities and customize its behavior
-
Themes which modify the look and experience of pages that are visible to your customers and admin panel
-
Linguistic communication packages which help to localize your store to a particular linguistic communication
Search and buy any of those types in such places as:
-
Magento marketplace. It is an official website for the Magento ecosystem, where Adobe reviews extensions earlier being published.
-
Packagist. A most mutual method of Magento extension installation is via the software tool named Composer, and Packagist is its default repository. You can check out the gratuitous extensions here.
-
Magento developer store. An official Mirasvit website is a store for Magento 2 and Magento 1 extensions.
Downloading extension on Magento Marketplace
To get an extension from Magento market you'll demand to create an account for it offset. Merely fill in all the required information regarding you and your company, and verify the new account by clicking on the link in the e-mail.
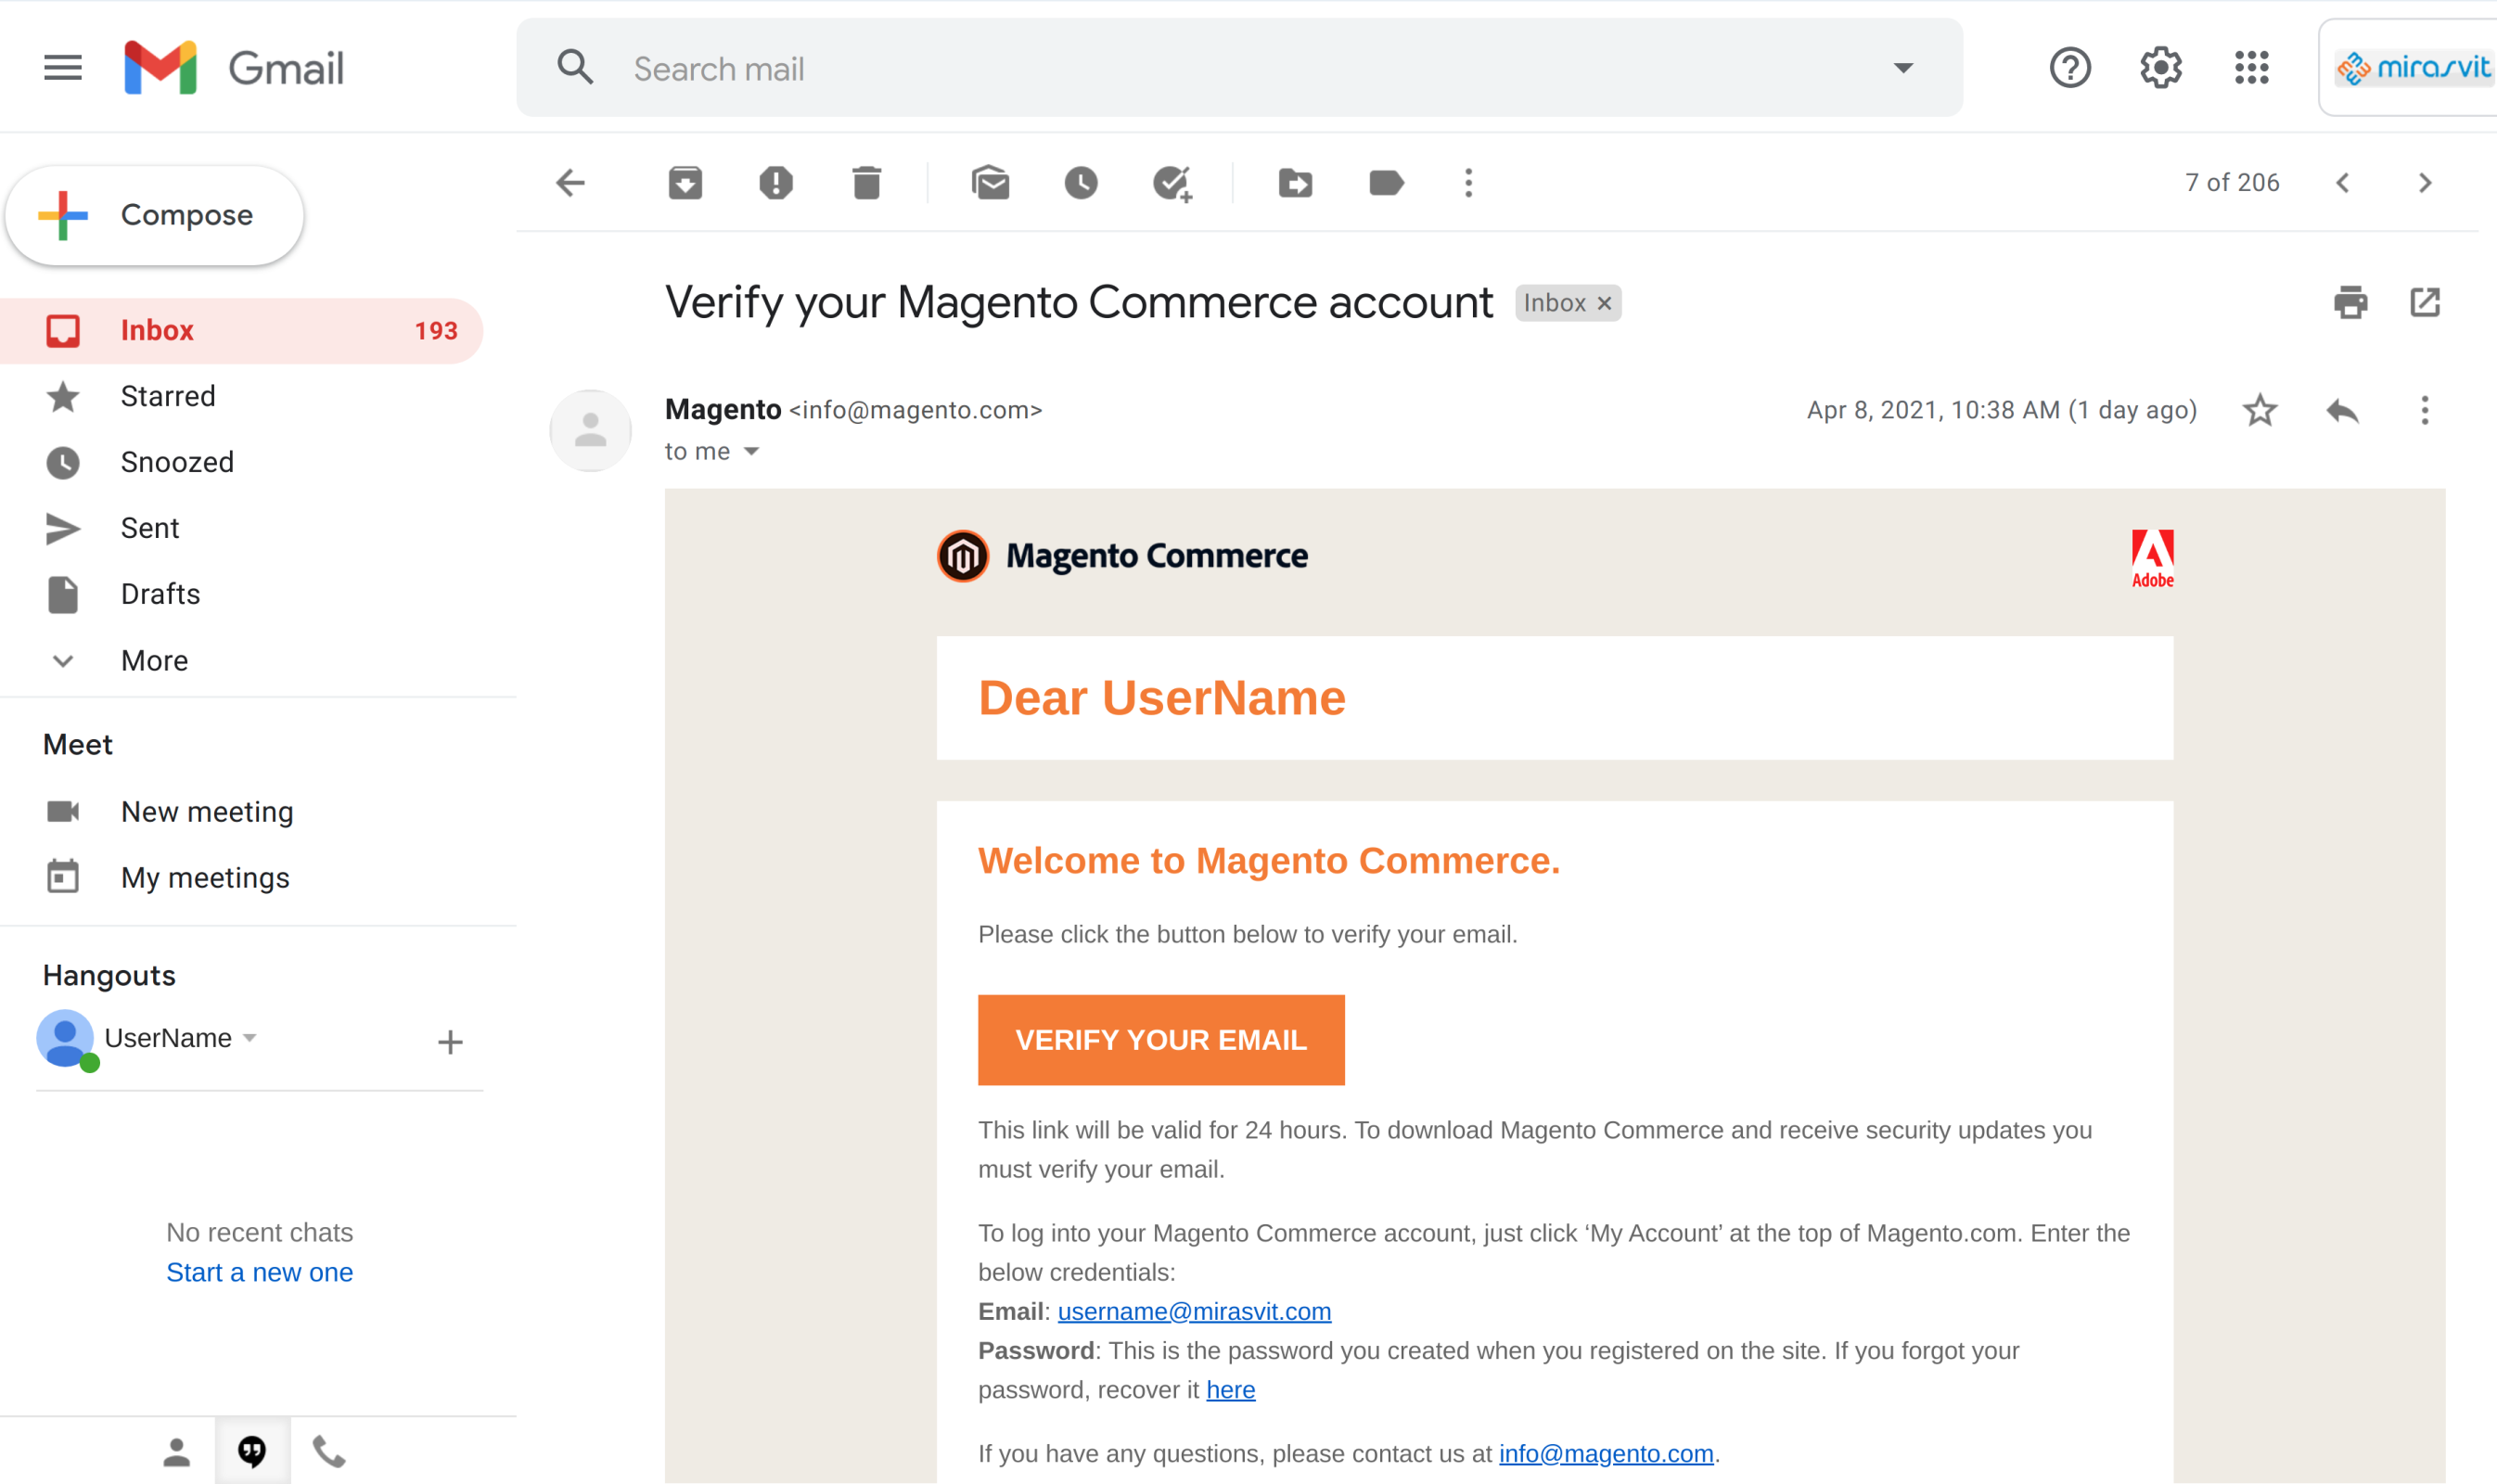
After that, return to the Magento market and log in to it if you weren't automatically logged in.
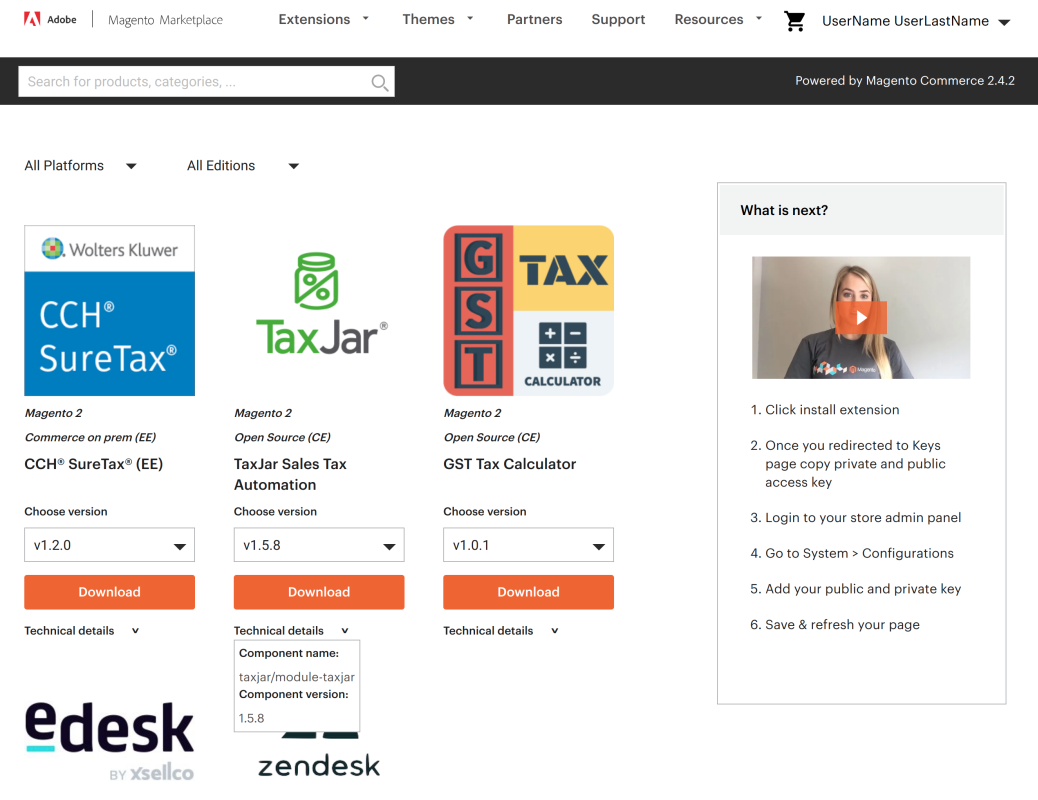
Notice the extension you need and purchase it – yous'll need to specify the Magento version your shop uses. When finished purchasing, click on your user proper name and select link My Profile. On the profile page, click on My Purchases to see the purchased extensions.

Locate the newly purchased extension and click on Technical details in the drop-downwards menu. Write down the Component name and Component version to utilise subsequently in command line.
Next click, on your user name and navigate to My Profile > My Products > Access Keys. Press Create A New Central Access, set its name and click OK. Save the public and private keys to the file.
Magento marketplace for Magento ii.three.5 and earlier
Earlier Magento versions prior to Magento ii.three.vi offer a built-in tool to download extensions from Magento market place which is called the Spider web Setup Wizard and is available in the Magento admin console.
The Web Setup Wizard has depreciated since Magento 2.3.half dozen and was removed following Magento 2.iv.0.
Magento strongly recommends using command line interface (CLI) to install extensions for all versions of Magento. Please annotation that this commodity does not cover the installation via Web Setup Wizard.
Packagist
Composer is the widely used tool to get the Magento software and packagist is the main Composer repository. It aggregates public packages installable with Composer and allows to search Magento 2 extensions by tag, name, type.
Visit packagist.org and search for an extension. You can apply filters Parcel type and Type. For example, you can specify Bundle blazon as magento2-module, and for the type, you can set magento 2 extension.
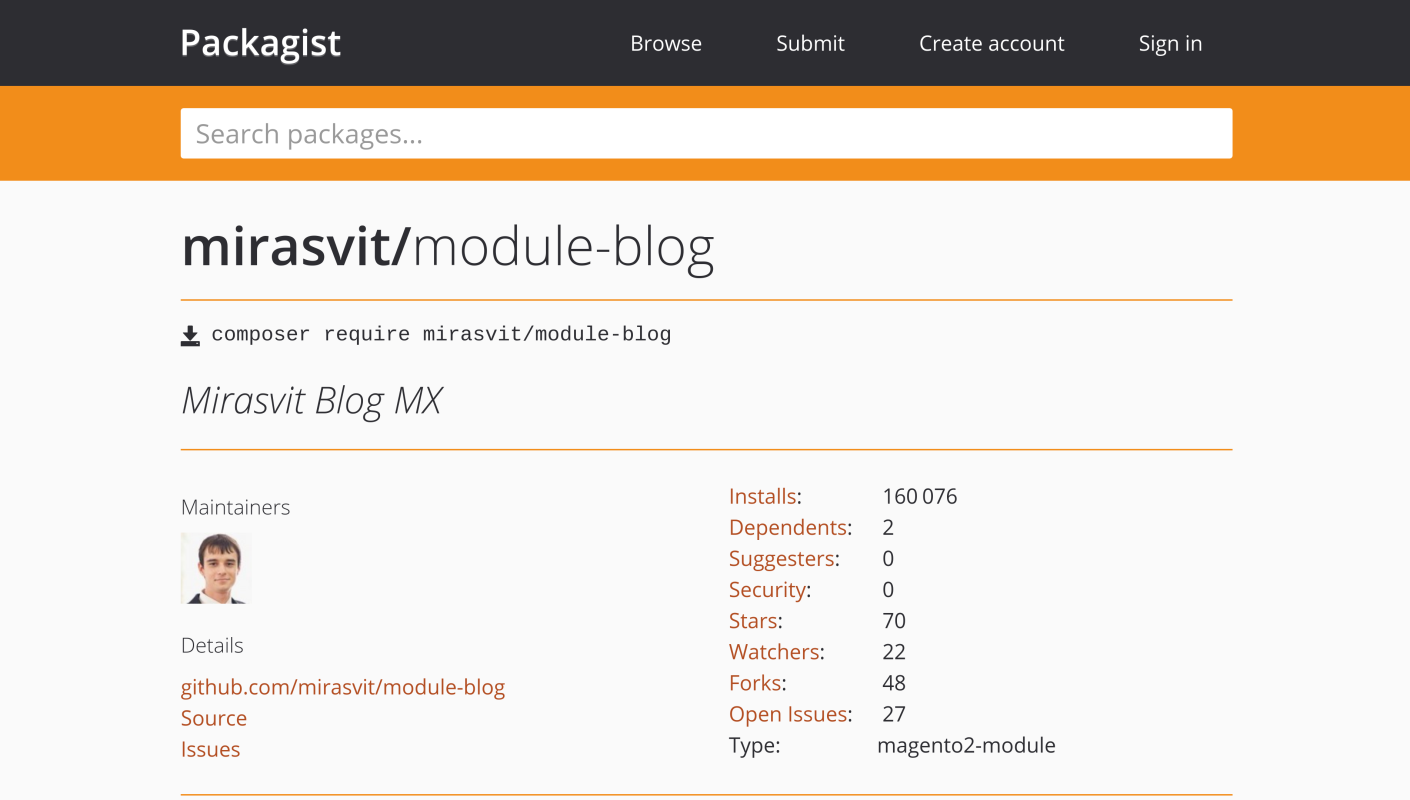
When the desired extension is institute, click on its link and write down the Composer installation command for the chosen extension.
Magento extension developer store
In addition to the Magento market place owned past Adobe, the Magento extension developers also provide their own stores. Mirasvit.com is 1 of such extension stores.
To get the Mirasvit extension, log in to the store and find the extension you need. Add together information technology to cart, and proceed to checkout, where you must specify credit bill of fare details and apply discount code.
Hint: Mirasvit offers discounts on new modules, and so yous'd better sign up for the newsletter to get the propositions.
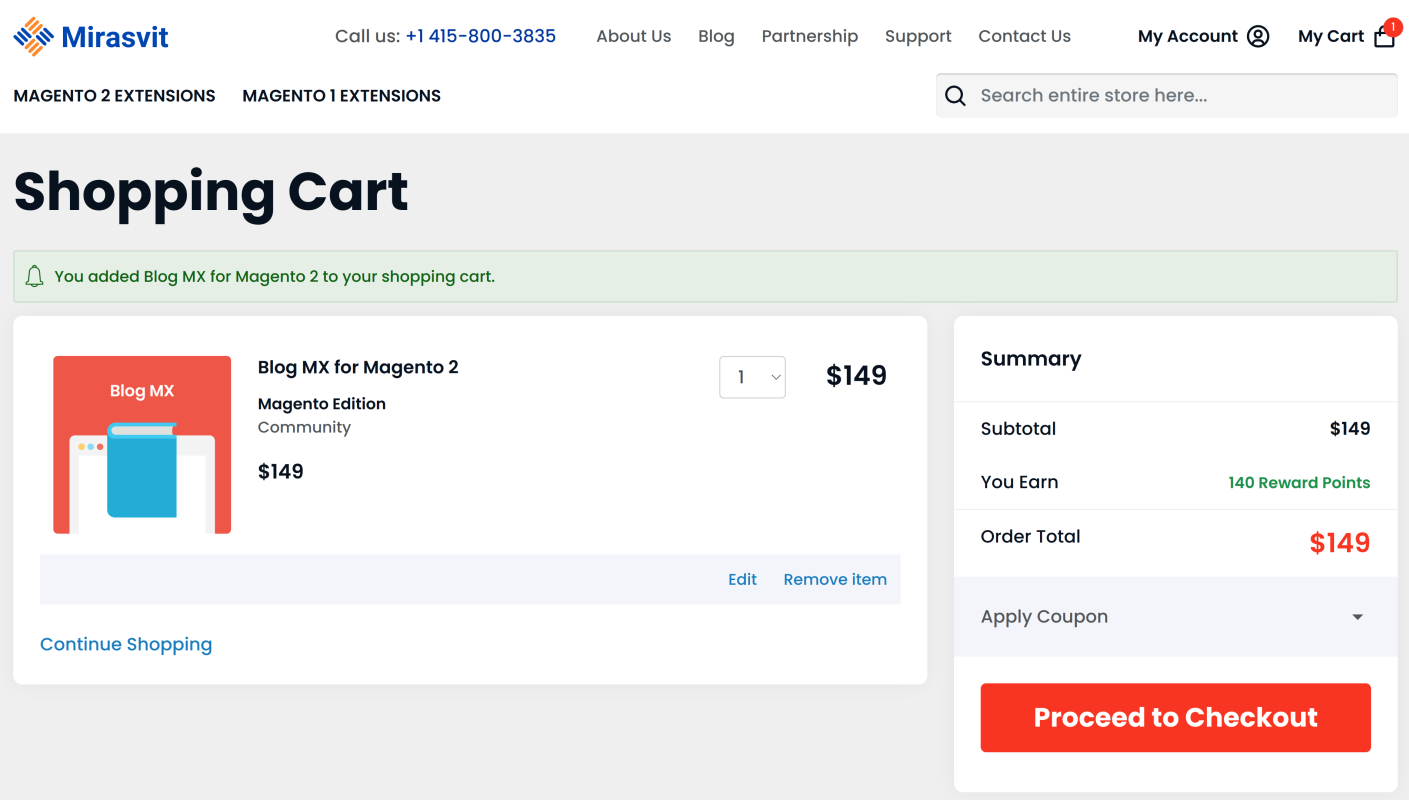
On the Mirasvit store after placing the order, navigate to My Account > My Account > My Downloadable Products to see the purchased extension.
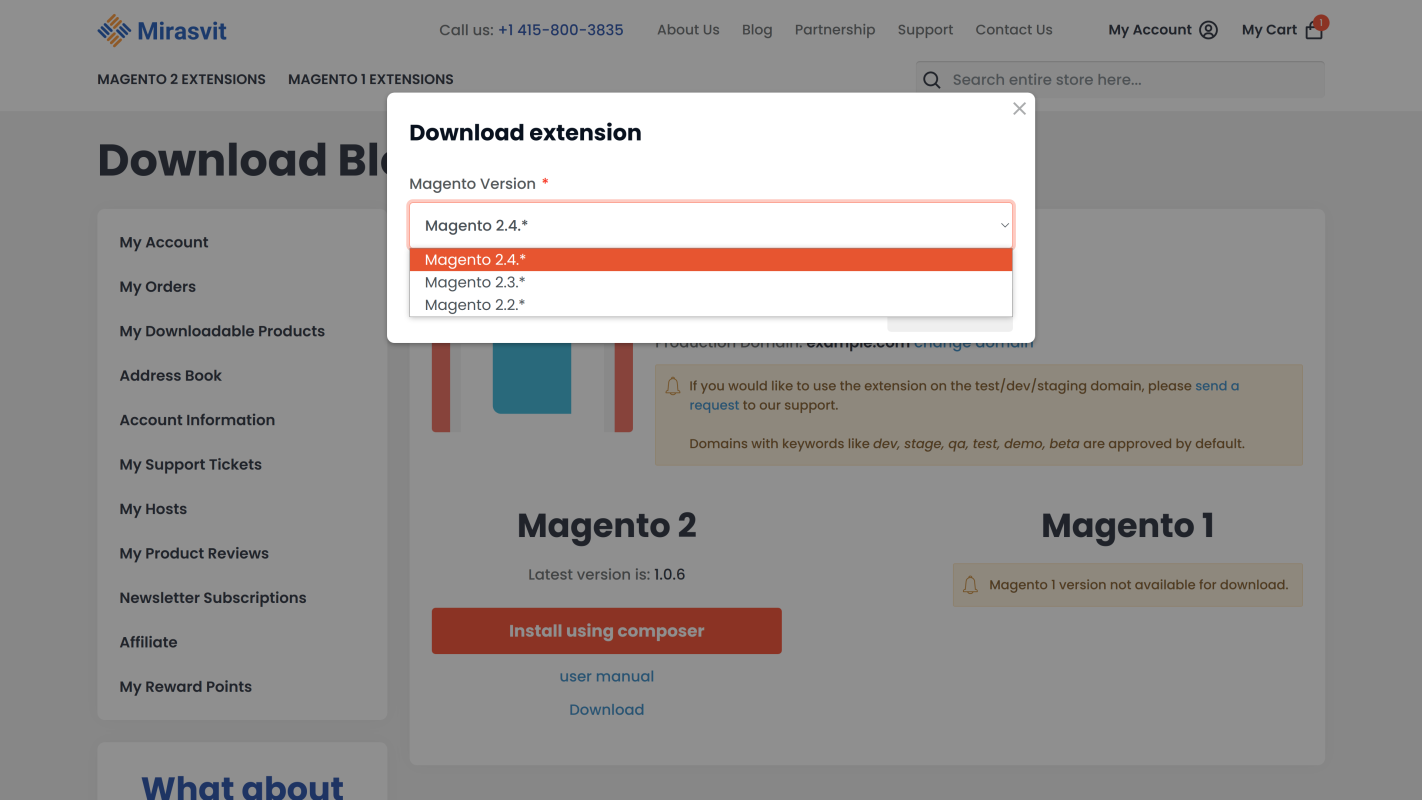
Before you volition exist able to download the purchased extension, specify the Product Domain of your store.
The Mirasvit license allows you to use the extension for one Magento installation. Also you can install extension on examination/dev hosts. To employ the extension on the test/dev/staging domain, please send a request to our support.
After providing the store Product Domain, you will become buttons for the installation via Composer and downloading the extension in a nil-package.
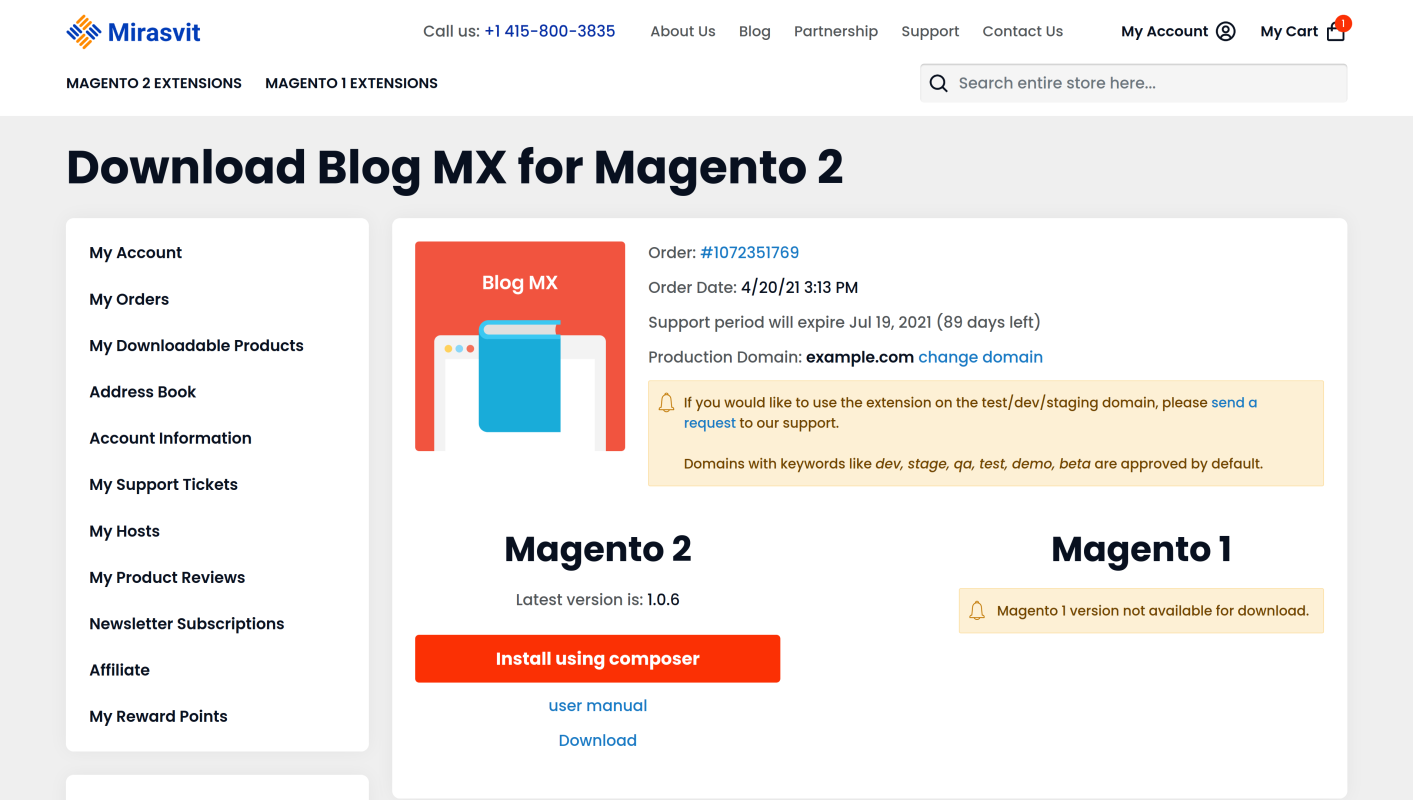
To install the extension via the Composer, copy the provided commands.
How to install Magento extension
How to install extension via Composer
Log in to SSH console of your server by typing in terminal ssh login@example.com, where login - is the login on the server case.com. Navigate to the root directory of Magento 2 store using control cd /magento, where /magento - is the Magento installation directory accost.
Cheque the Composer version
Verify that your server has uniform Composer version by executing the command composer --version.

If your Magento version is below 2.iv.2, and then the Composer version should be v1, for Magento 2.4.2 and above Composer v1 and v2 are allowed. Install the required Composer version following the guide on getcomposer.org.
Beginning installation
To install the module in the last, navigate to your Magento installation binder and run the control:
composer require <component-proper noun> Replace the with the information for the item extension.
How to install extension from Magento marketplace
Exist sure that you lot take called the correct version of Magento edition when purchasing the module on Magento marketplace. Versions for the the Commerce on prem (EE) volition brandish an error message when trying to install on Open Source (CE).
For extensions purchased on Magento market, replace the with the component name marketplace provides. For case, the TaxJar Sales Tax Automation extension has the post-obit component proper noun: taxjar/module-taxjar.
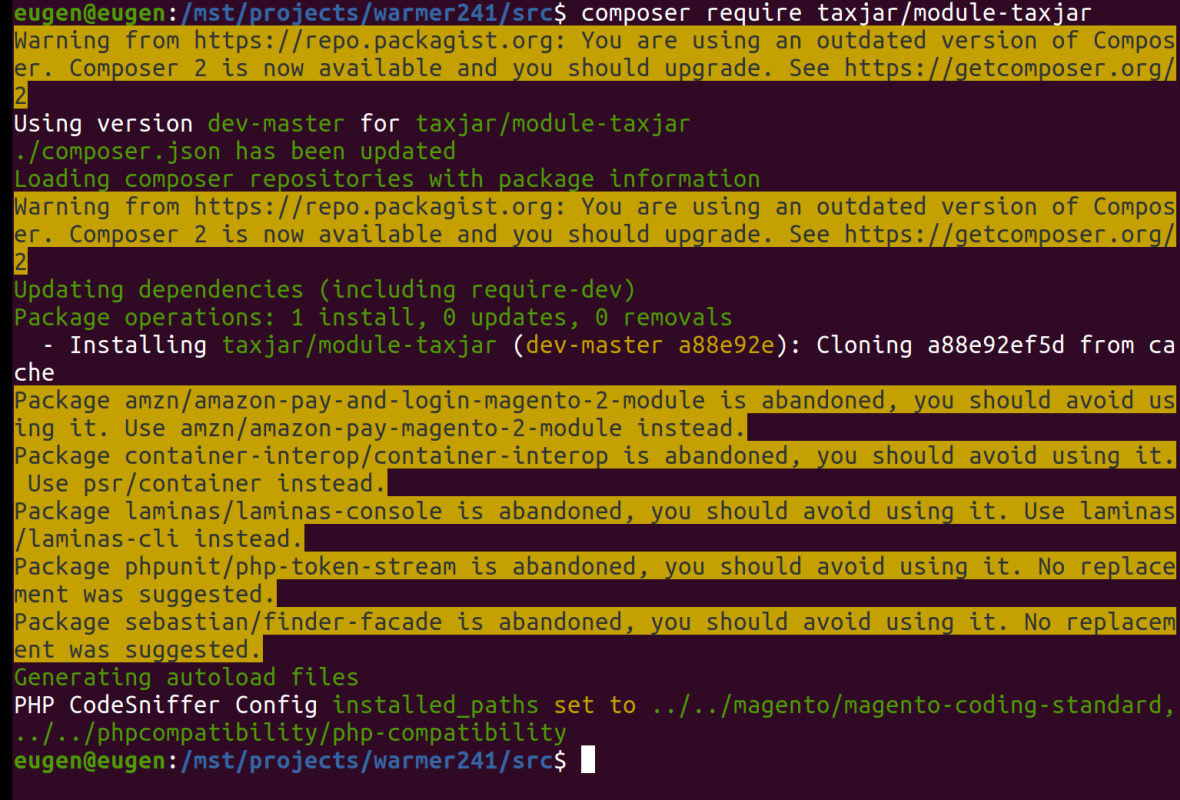
Composer can request a username and a countersign for extension installation. In such example, utilize keys that are generated in the Magento marketplace account as shown in this commodity previously. The public key is your username and your individual primal is your password.
How to install extension from Packagist
In the terminal, just paste the Composer control the Packagist provides. For Mirasvit module BlogMx, the command is:
composer crave mirasvit/module-blog 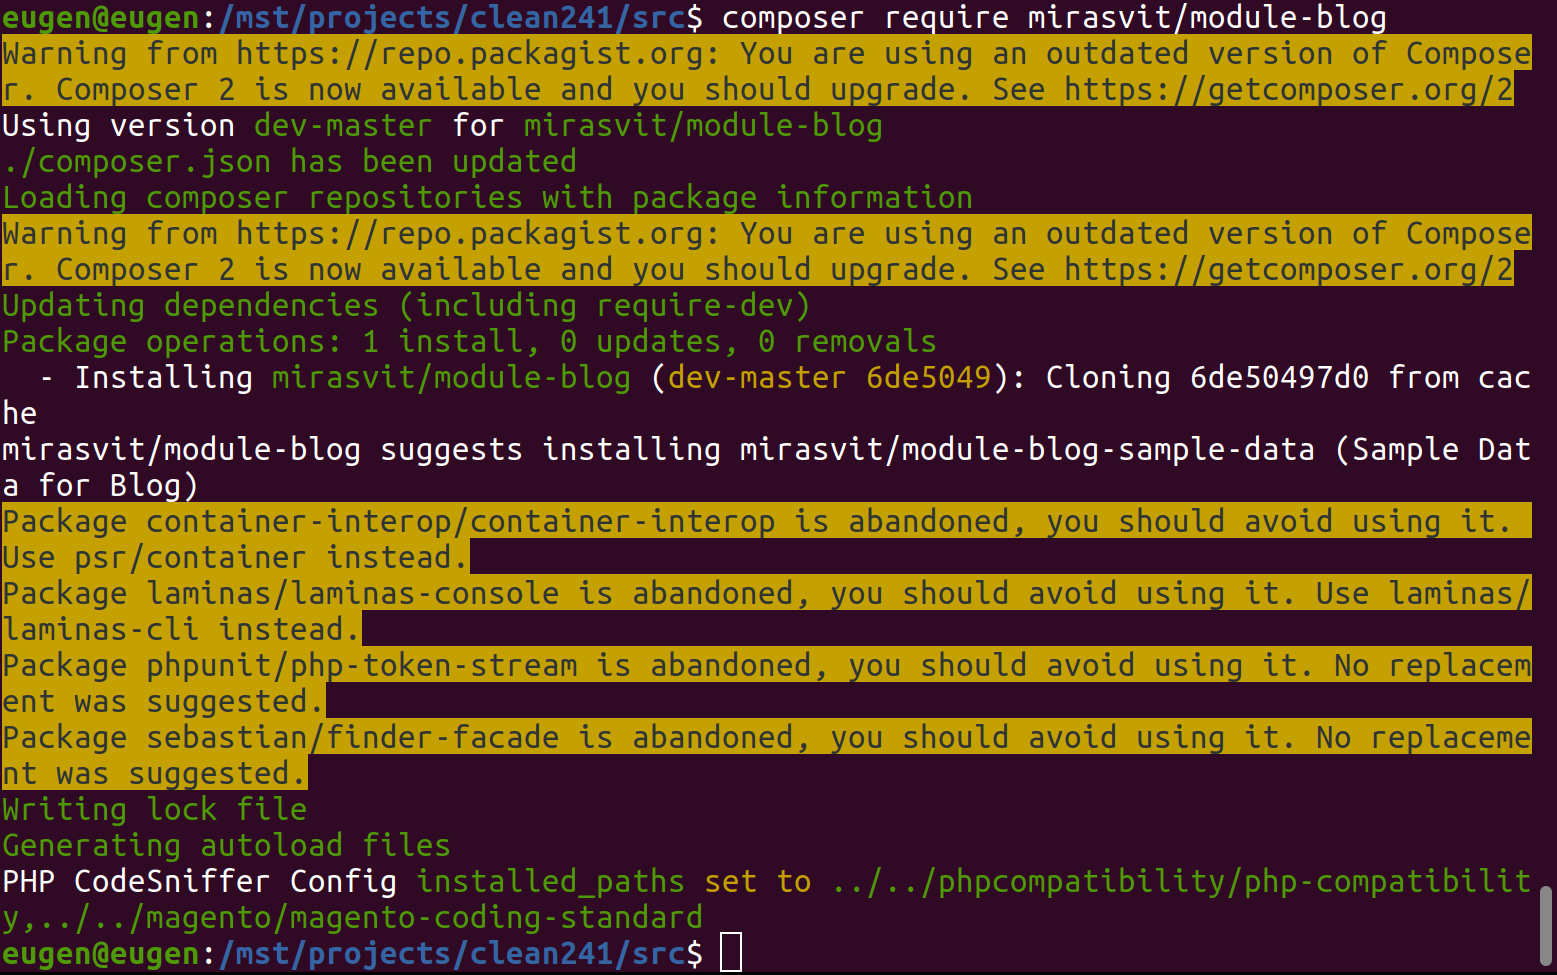
When executing the installation command, Composer may arrest the installation due to a mismatch in the specific platform requirements. In such case, it is usually simpler to install the extension manually via the ZIP-parcel.
Circumspection: there is a central --ignore-platform-reqs for Composer that can override a mismatch in required components versions. It is not recommended to use this key since incompatible packages tin can be installed, and that can bring the store to an inoperative state.
How to install Mirasvit extension
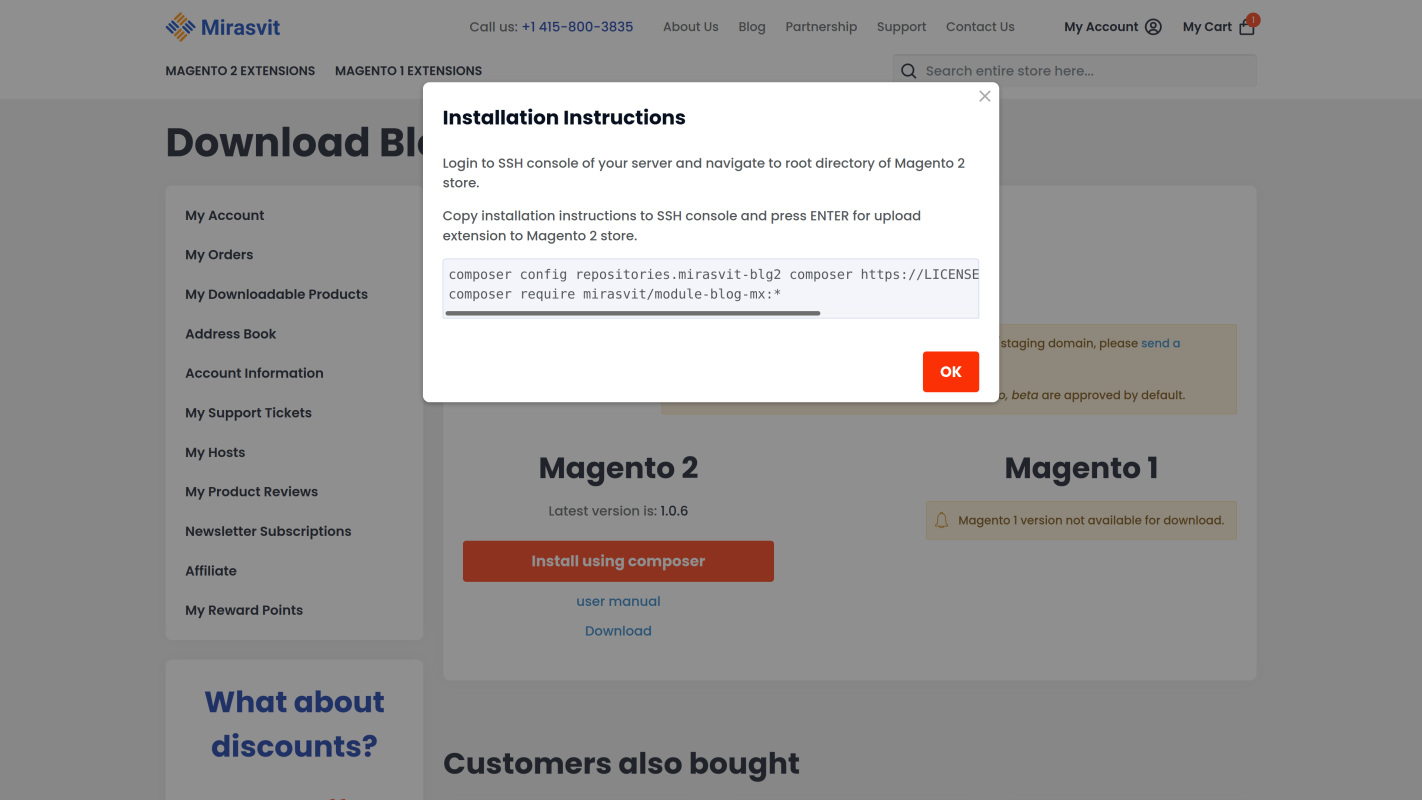
In your business relationship on Mirasvit store, click My Business relationship > My Account > My Downloadable Products > View & Download > Install using composer. You will be provided with Installation Instructions. It is a list of two Composer commands, though the may look like iii commands.
The first command connects Composer to Mirasvit repository and provides the license data:
composer config repositories.mirasvit-blg2 composer https://LICENSE:LICENSE@pack.mirasvit.com/LICENSE:LICENSE/ The second control launches the installation of the purchased extension:
composer require mirasvit/module-blog-mx:* 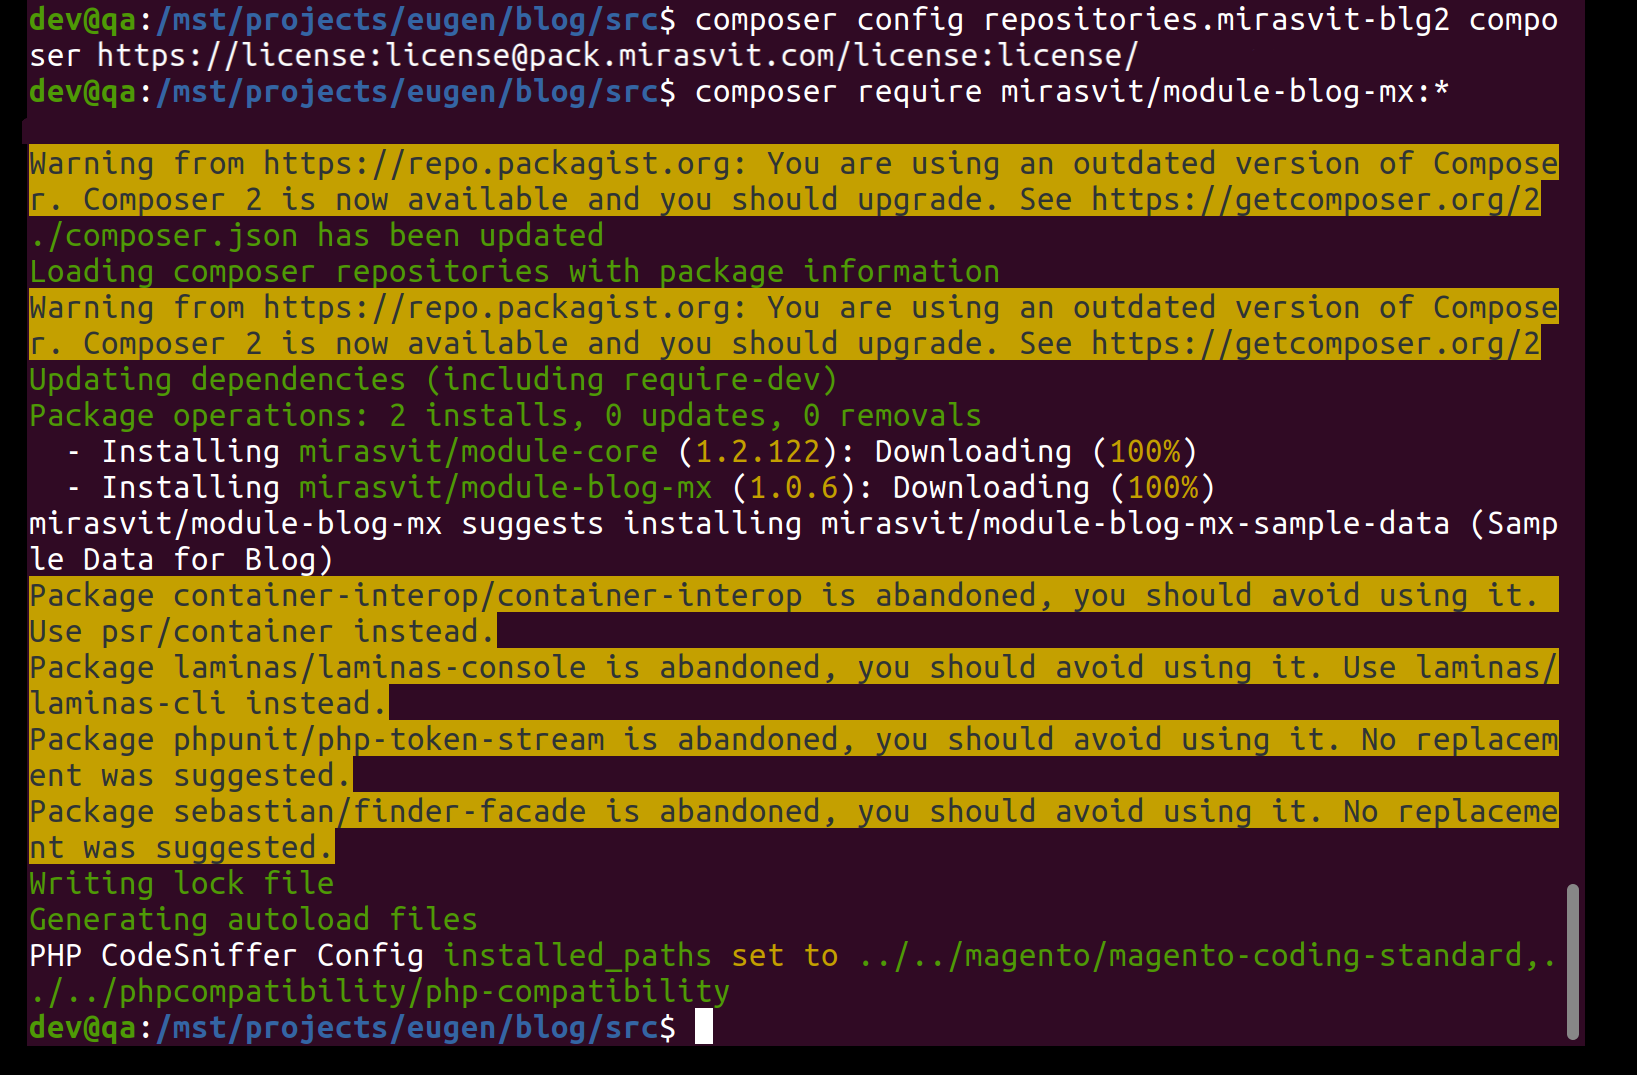
Hint: Mirasvit provides free installation of its extensions so yous can simply cheque the corresponding pick before calculation an detail to the cart and the extension volition be installed for yous.
How to install extension via Zilch-file
Manual extension installation using archive with the extension code is done by copying its files to Magento installation folder.
Obtain the extension parcel
To obtain the zero-package for the extension purchased on Magento market place, visit My Profile > My Products > My Purchases. Choose the extension version yous want to download and click the Download button.
Identically to become a zip-packet from the Magento extension developer store login to your business relationship and locate the purchased modules.
For Mirasvit store, visit My Account > My Account > My Downloadable Products and click on the download link. Specify your Magento version and download the parcel.
You can obtain the cipher-parcel with the extension code from whatsoever place. For example, information technology tin exist a programmer's profile on Github.
Check ZIP content
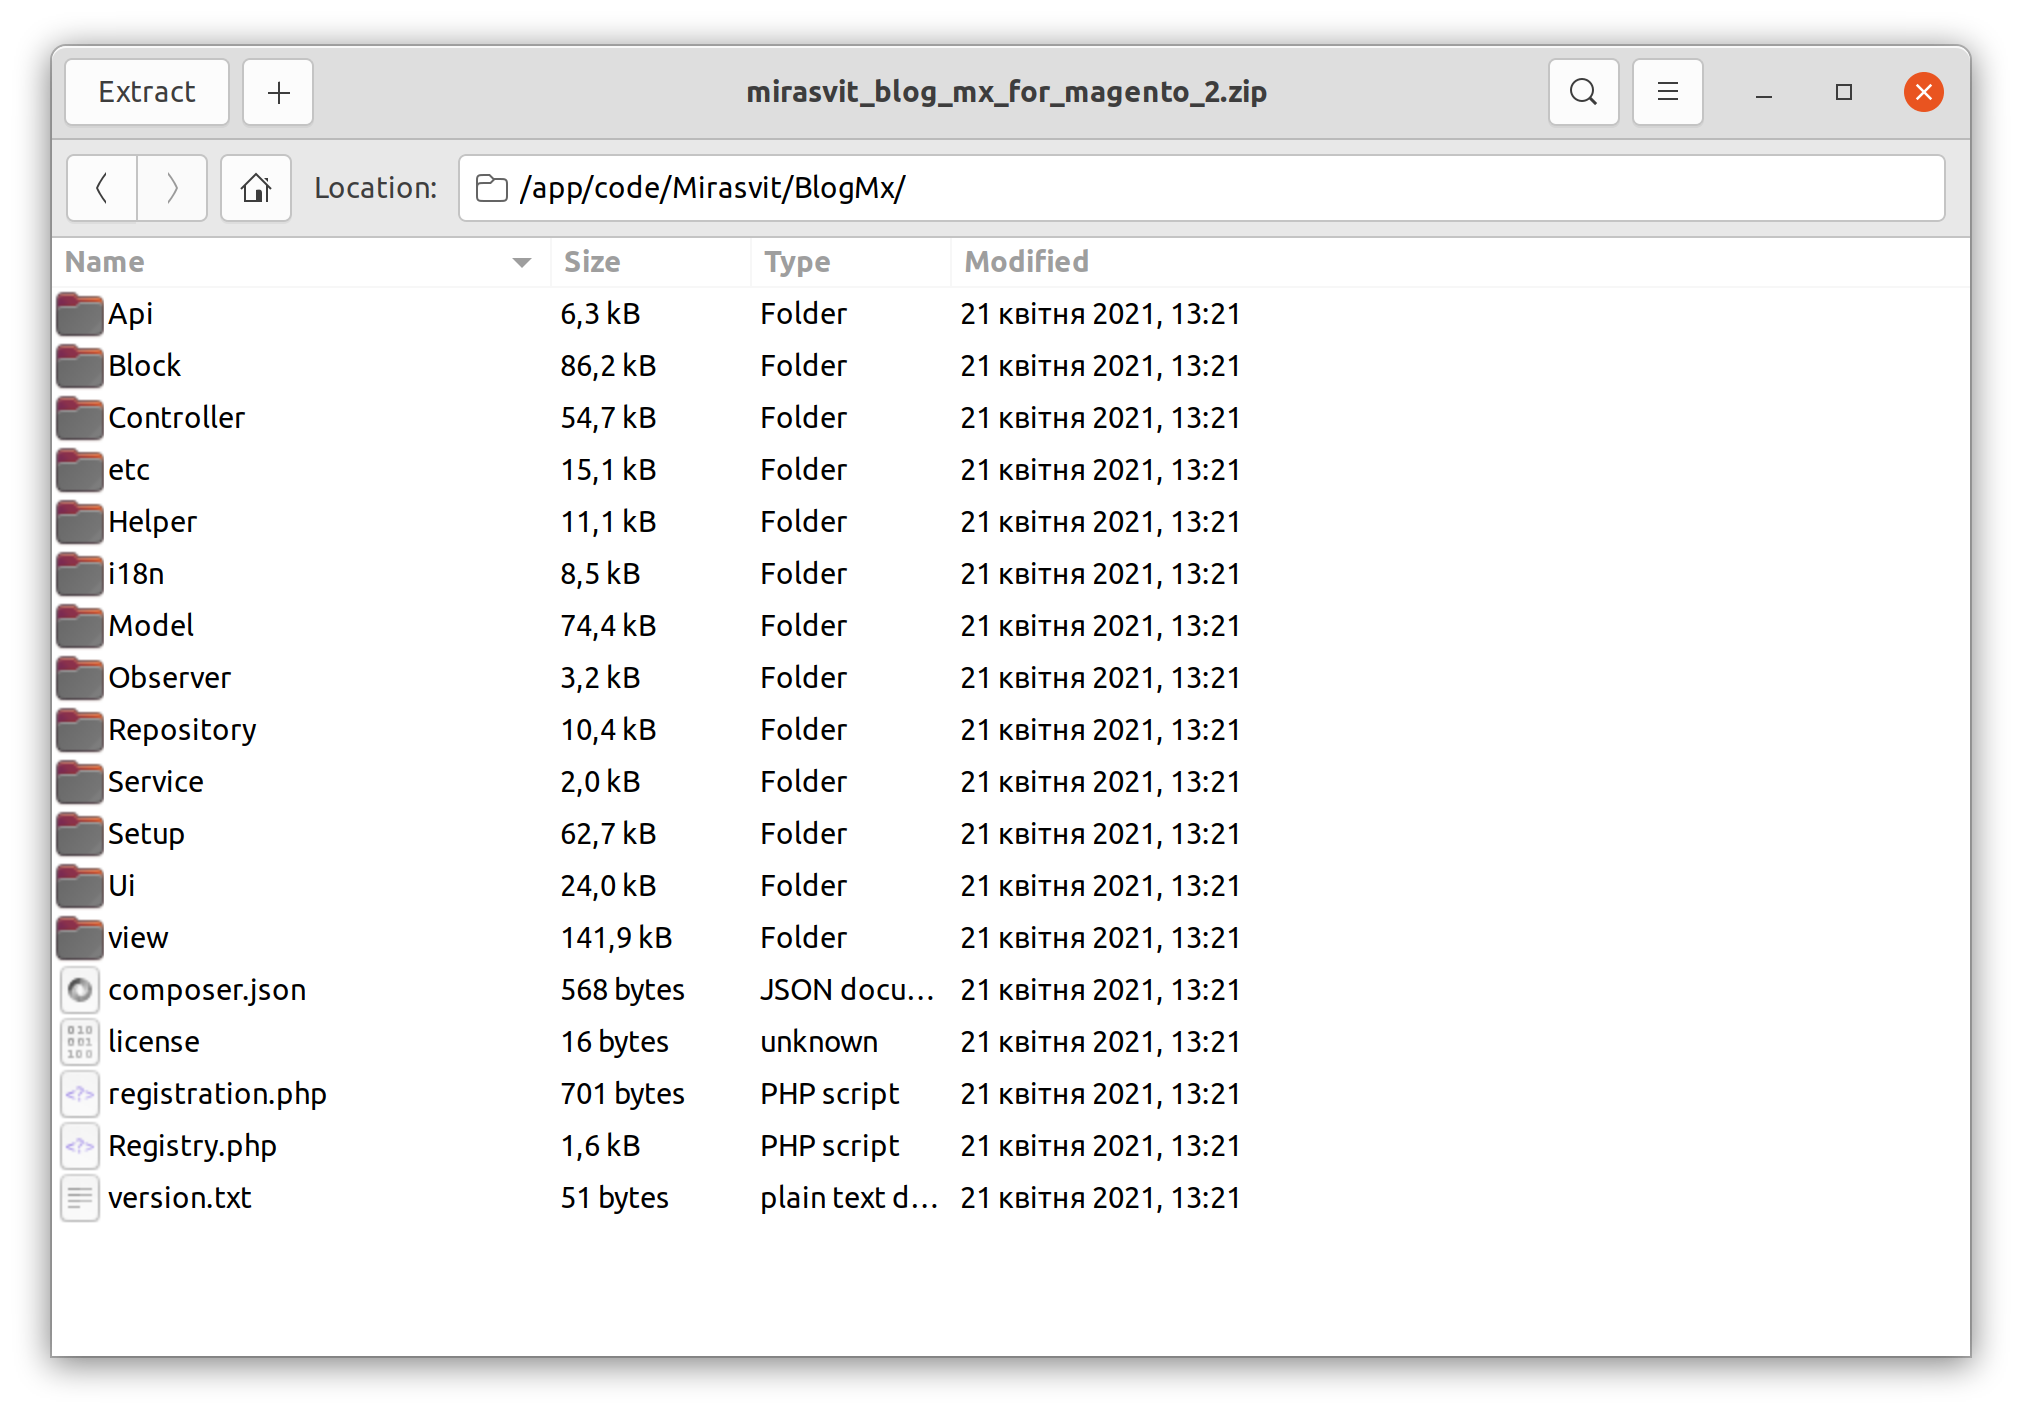
Excerpt the package into any new folder on your local estimator. If subsequently the ZIP package extraction, you see folders similar Api, Block, Console, and you don't see nested folders app/code and then you need to create them.
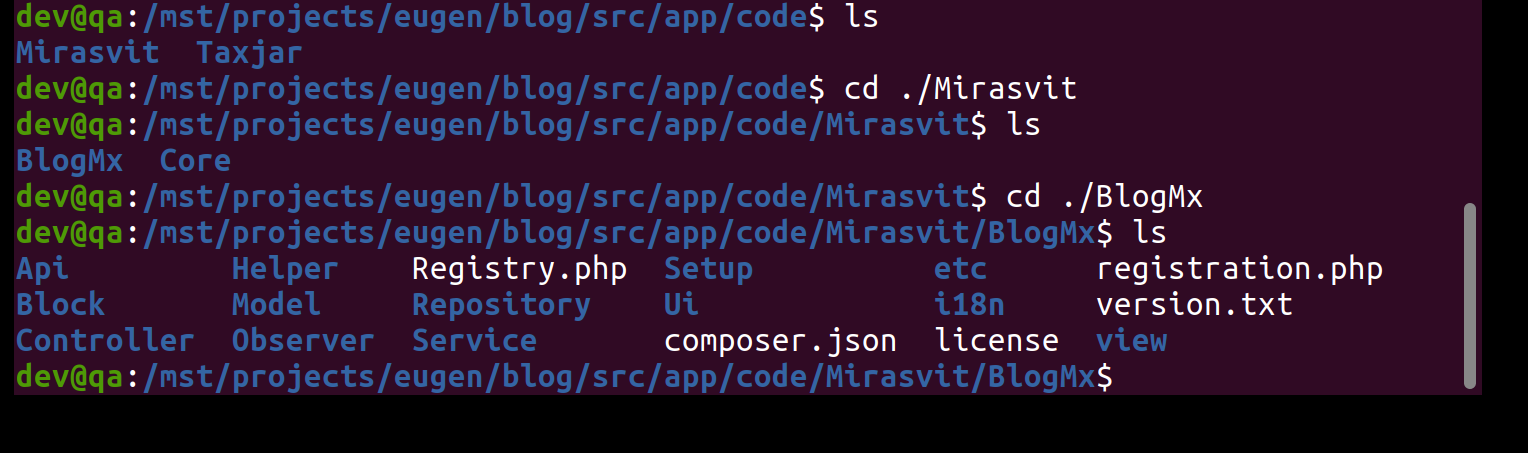
For example, the Mirasvit extension BlogMx is ready to be copied as is because it has nested folders /app/code/Mirasvit/BlogMx/:
The extension TaxJar Sales Tax Automation obtained on Magento marketplace doesn't have the nested folders and requires them to be created:
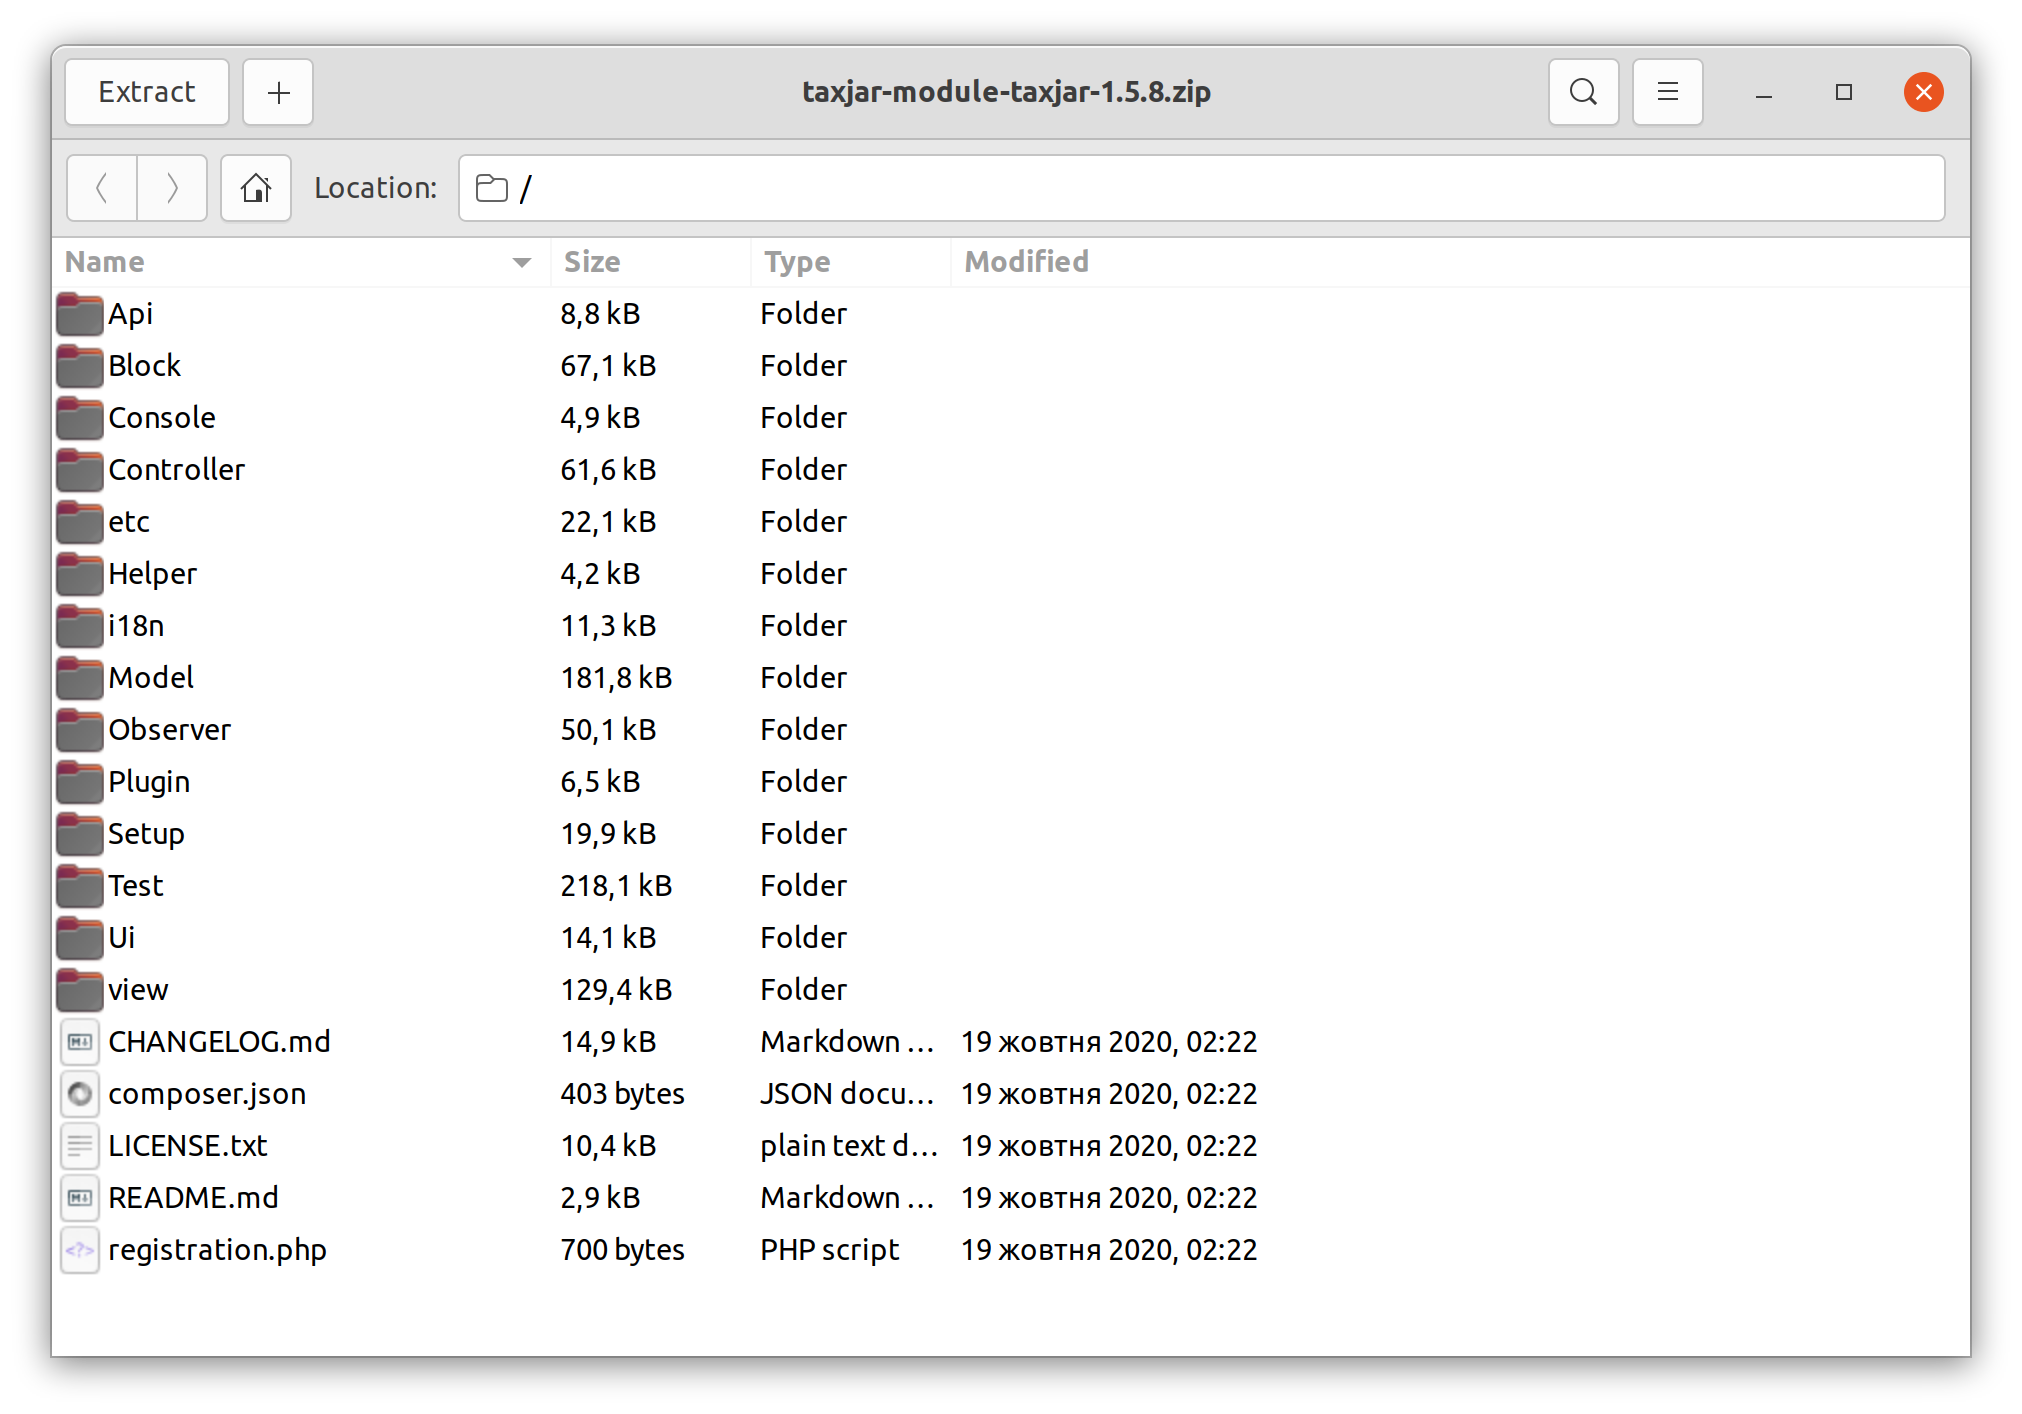
For such zip-packages as TaxJar extension, open up the module file registration.php and find the text ComponentRegistrar::MODULE. After this text in quotes volition be the proper name of the module: Taxjar_SalesTax.
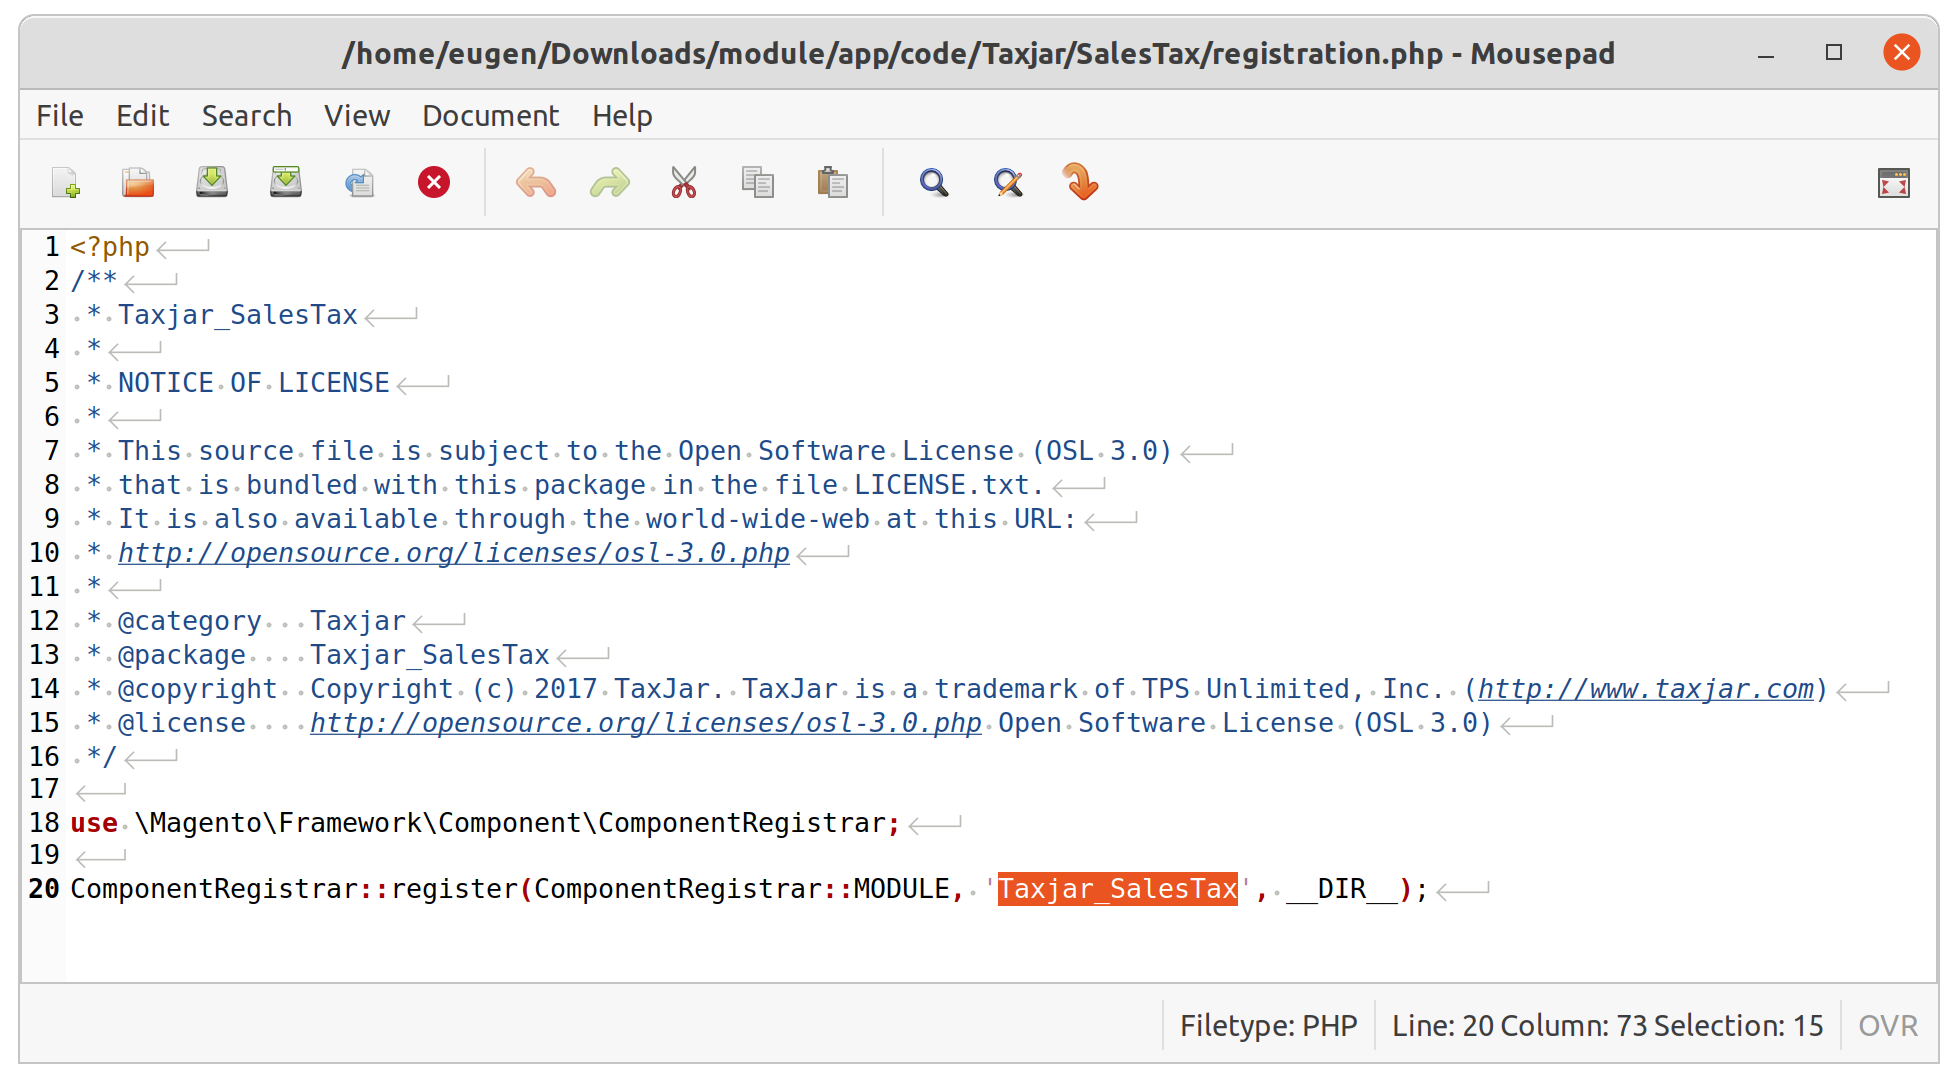
Create nested folders so that the path looks like /app/code/Taxjar/SalesTax/. Re-create the content of the zip-bundle into the SalesTax folder.
Re-create the module files to Magento host
When you accept module files with proper nested folders path, yous can copy the module to your Magento installation folder.
Upload the module files with the command:
scp -r /local/dir/app user@remotehost:/remote/dir/ The local folder app and its content will exist copied to the remote path /remote/dir/.
Using SSH, connect to your Magento host and navigate to the Magento installation folder, and and so - to folders /app/lawmaking/. Check if the copying was successful:
Finish the installation
Magento extension installation via Composer or a ZIP-file simply copies the files to Magento installation binder. To properly incorporate new module into the Magento, you need to run some commands.
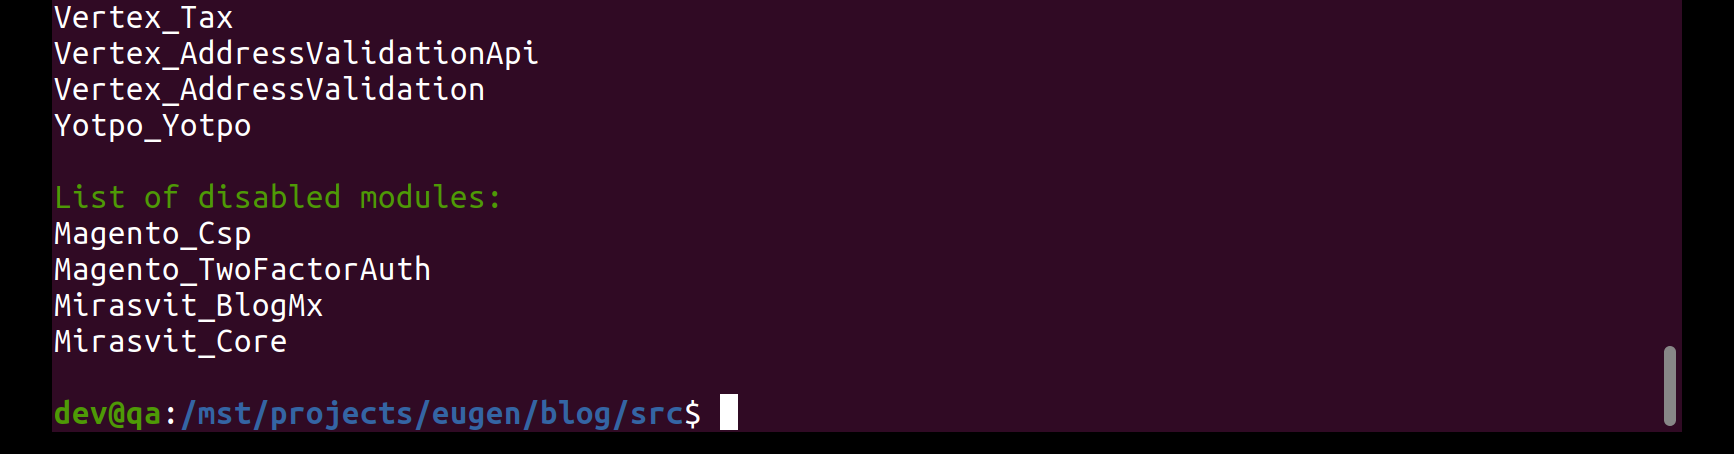
Offset check that Magento recognized the copied files:
php7.3 bin/magento module:condition You will be listed with all extensions available in your Magento installation. At the list bottom you will run into the List of disabled modules. Since Mirasvit_BlogMX also contains its core module Mirasvit_Core, you will run across two disabled Mirasvit modules:
Enable each module (replace VendorName_ModuleName with the name of your module) and clear static view files with the respective command:
php7.3 bin/magento module:enable VendorName_ModuleName --clear-static-content Some extensions for Magento consist of several modules. For example, Mirasvit_BlogMx depends on Mirasvit_Core. You lot can activate the chief module first and so the dependent module executing these two commands one past one:
php7.3 bin/magento module:enable Mirasvit_Core --clear-static-content php7.three bin/magento module:enable Mirasvit_BlogMx --articulate-static-content 
Or y'all can activate both Mirasvit modules at once using the commands
php7.iii bin/magento module:enable Mirasvit_Core Mirasvit_BlogMx Verify that the extension is enabled:
php7.iii bin/magento module:status The extension should exist in the Listing of enabled modules.
To brand certain that the enabled modules are properly registered and their tables in the database are created, run
php7.3 bin/magento setup:upgrade 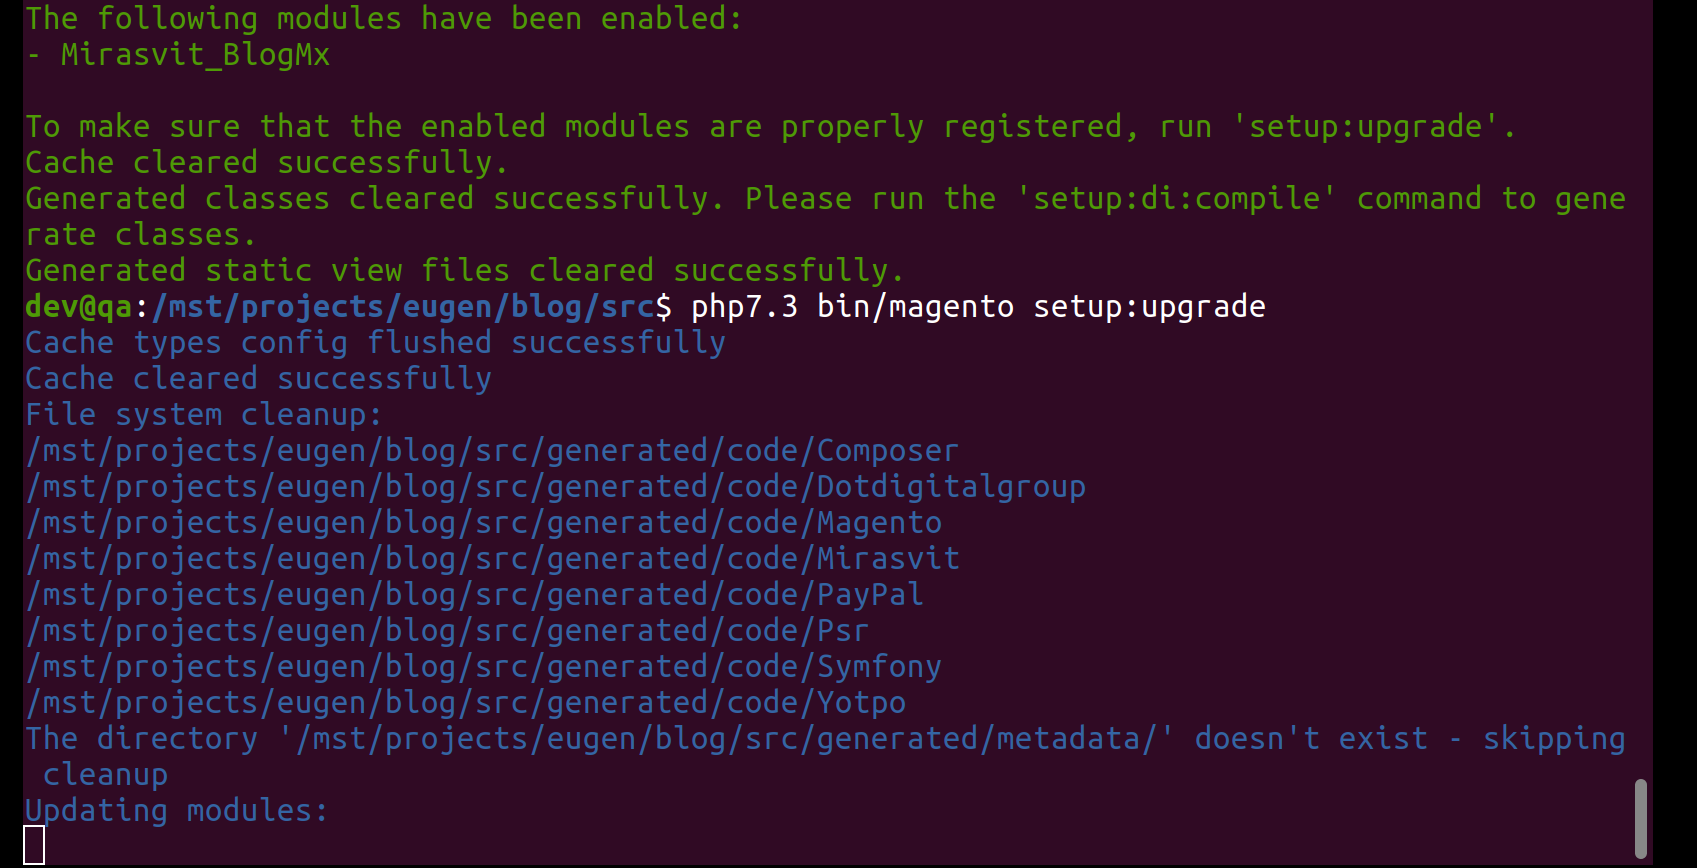
So recompile your Magento projection to generate code and configure dependency injection. You lot may receive such prompt "Please rerun Magento compile command" when your Magento installation is in Product mode. Magento does not prompt you to run the compile command in Developer fashion.
php7.3 bin/magento setup:di:compile 
Deploy static view files to Magento public directory. Use the following control to practise that:
php7.3 bin/magento setup:static-content:deploy -f The final stride is to clear all cache:
php7.3 bin/magento cache:affluent Now you lot can return to Magento admin panel and configure the newly installed extension as needed.
How to upgrade a Magento 2 extension
To update or upgrade an extension, first take note of its vendor and module names, and the version number using control to show the list of all extensions installed via Composer:
composer show -i Then run the Composer command:
composer update vendor-name/module-name You can encounter a mutual problem with this control that Composer states "Nothing to install or update." Information technology can be imitation positive, and the problem can be solved with transmission editing of composer.json file to set the correct versions of required components.
But it can be much simpler to run control:
composer require vendor-proper noun/module-name:new-version-number 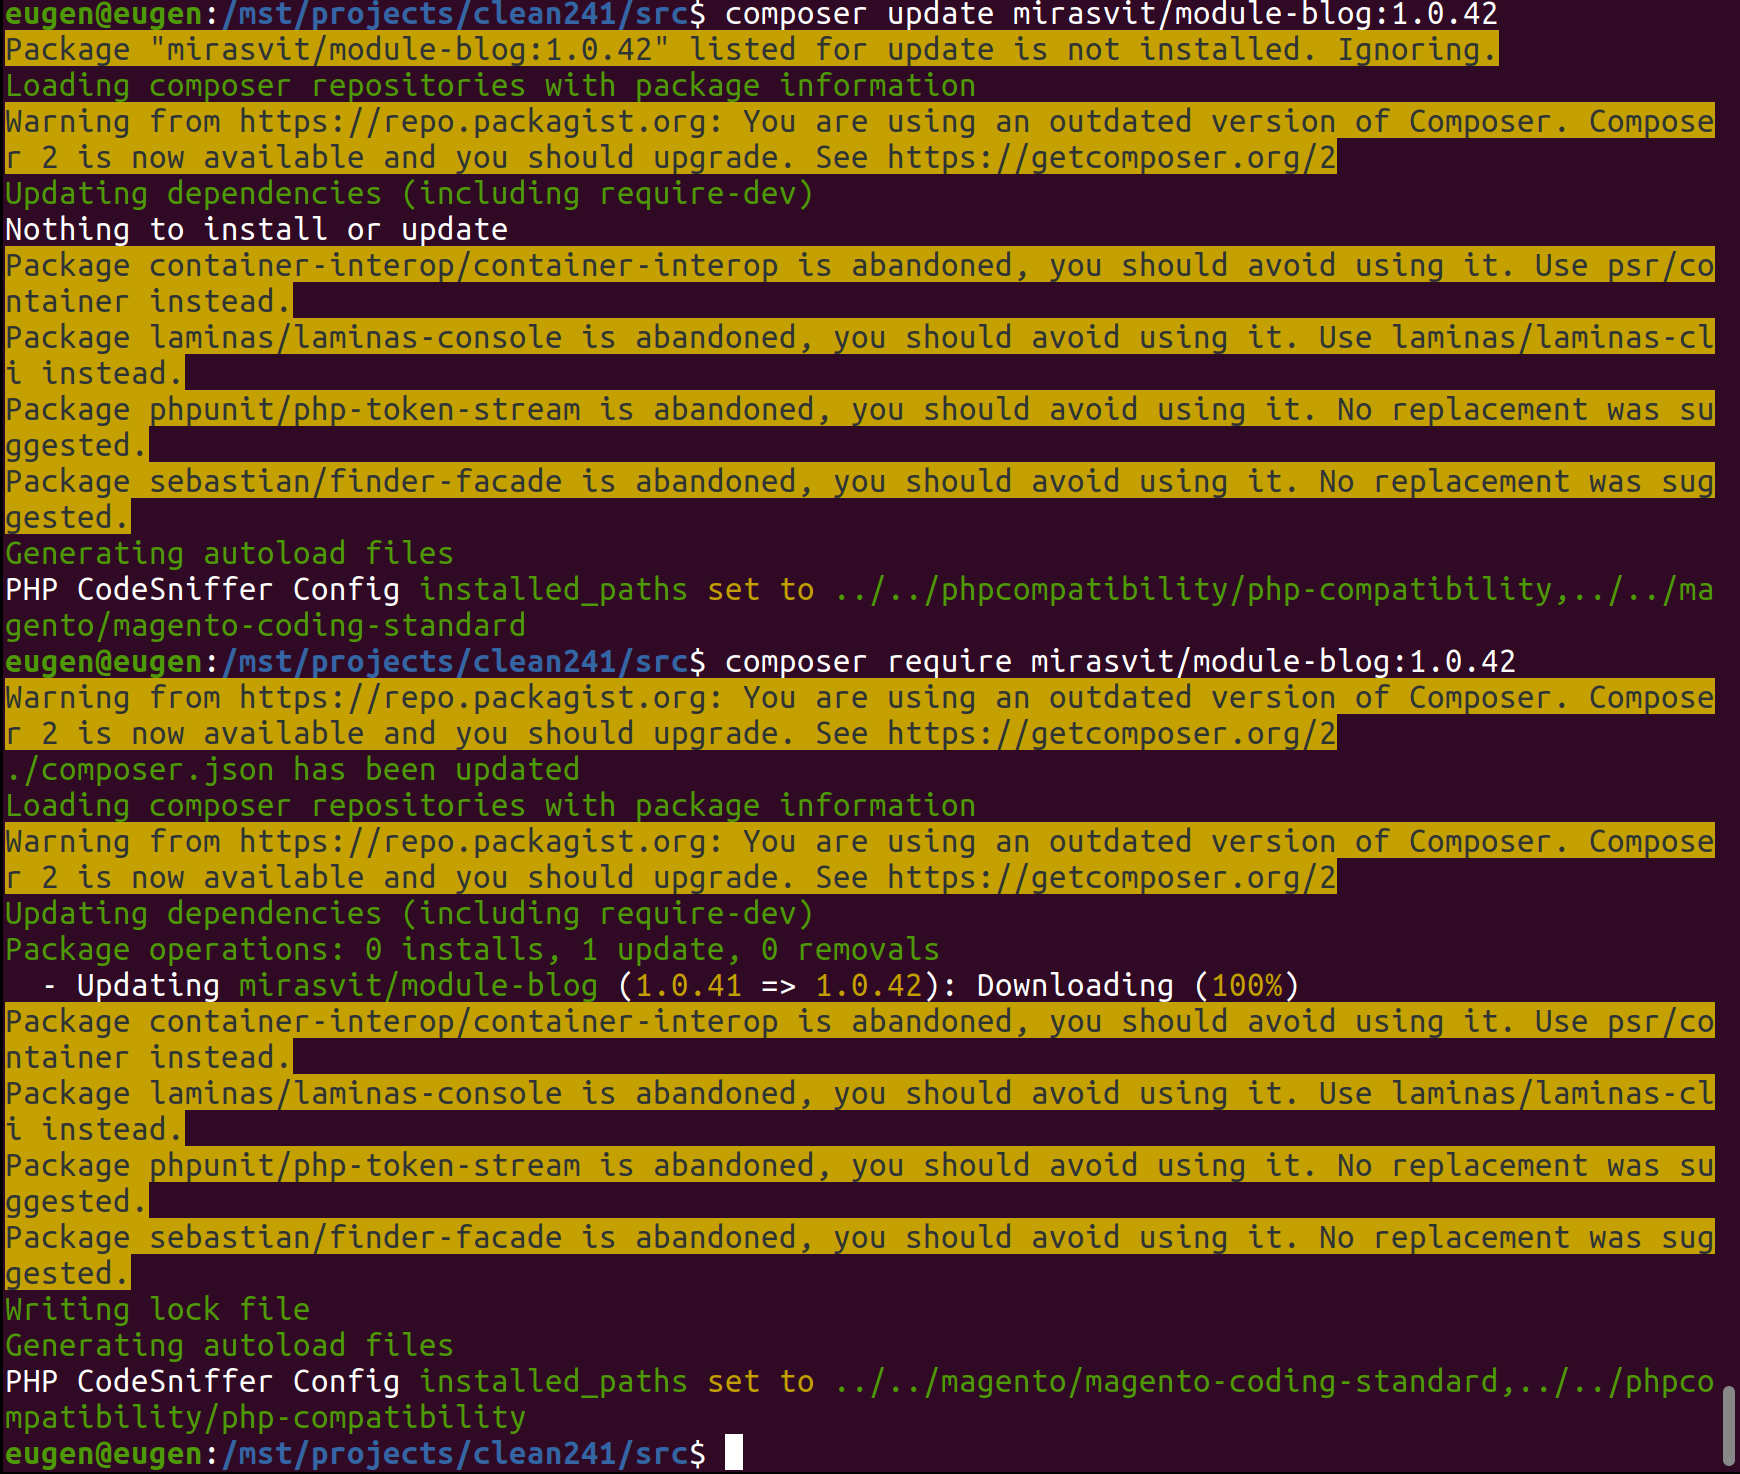
If y'all installed the extension manually by copying the content of the ZIP-package to Magento binder, then simply overwrite whatsoever existing files with the new version.
In both cases, run commands to upgrade, deploy, and clean the cache:
php7.3 bin/magento setup:upgrade php7.3 bin/magento setup:static-content:deploy php7.3 bin/magento cache:clean How to uninstall Magento 2 extension
Uninstall modules installed via Composer
To uninstall Magento 2 extension, navigate to your Magento installation directory and disable it:
php7.iii bin/magento module:disable VendorName_ModuleName Then uninstall the extension:
php7.3 bin/magento module:uninstall VendorName_ModuleName Replace VendorName_ModuleName with the name of the uninstalled module. The module proper name can exist obtained in the list of installed modules when the control php7.3 bin/magento module:status is executed.
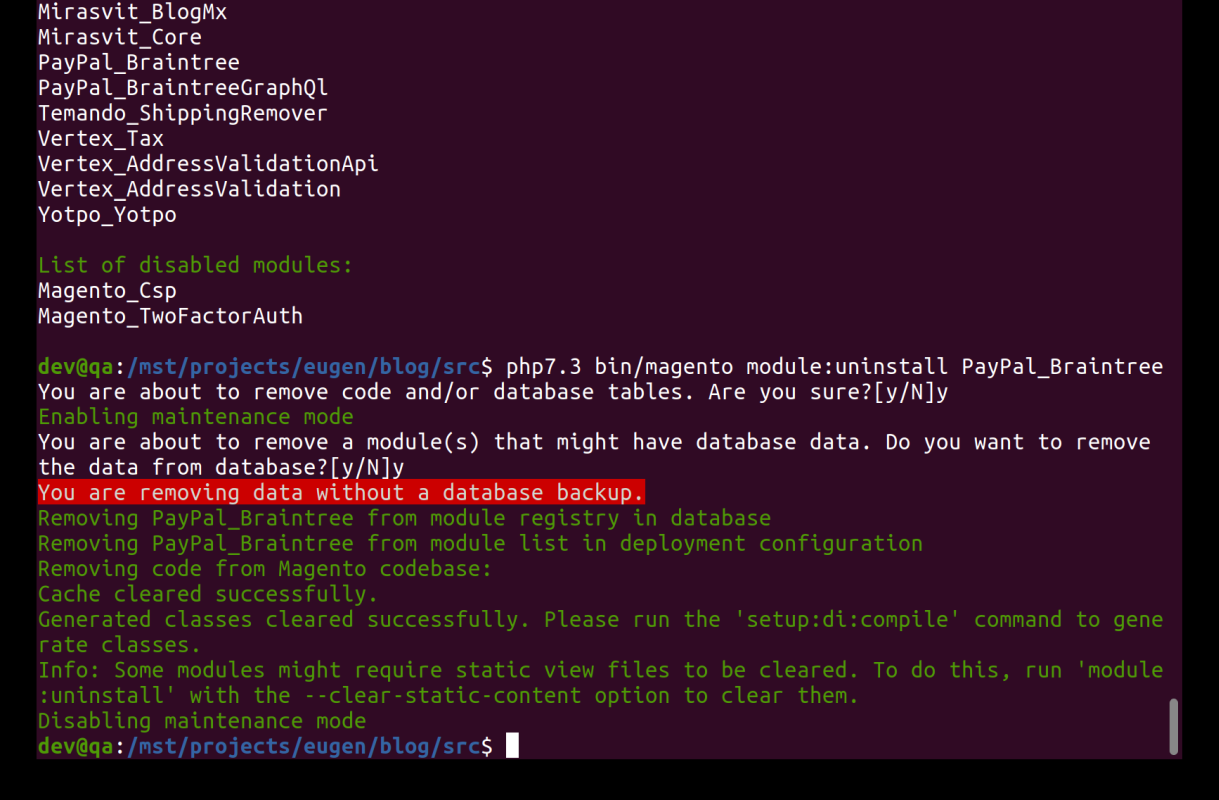
The final asks if y'all are certain of removing code and/or database tables. It too will warn you lot that yous are about to remove a module that might accept database data. Answer yes for both questions and wait for the process to stop.
During the module deinstallation process Magento will be automatically set to maintenance mode. After uninstall the maintenance mode will exist automatically disabled.
Uninstall modules installed via Goose egg-package
If you did not install the module via Composer, the command php7.three bin/magento module:uninstall volition non work.
For modules installed via Zilch-bundle, y'all tin but disable information technology with the command php7.3 bin/magento module:disable VendorName_ModuleName.
If you demand to remove the module installed via ZIP-bundle, then afterward disabling it, remove its folder in app/lawmaking, and remove its records in the database tables. Specifically remove the module record from the table setup_module.
At the cease run command php7.three bin/magento setup:upgrade.
Summary
Built-in functionality of Magento 2 can be greatly extended by using third-political party extensions. They tin can alter frontend and backend parts of your store then that it perfectly suited your vision and business concern needs.
Some Magento extension stores, like Mirasvit.com, offer free installation service. Even so you lot can get value to you module from a source that doesn't provide such service.
Using this tutorial, you volition be able to manipulate extensions in your store. Install the extensions by yourself with ii methods - via Composer tool and manually via the ZIP-package. Update and uninstall extensions installed with each of these methods.
And remember to dispense extensions safely by making backup copy of Magento files and database.
Source: https://mirasvit.com/blog/how-to-install-magento-2-extension.html